The Chelsea Chop

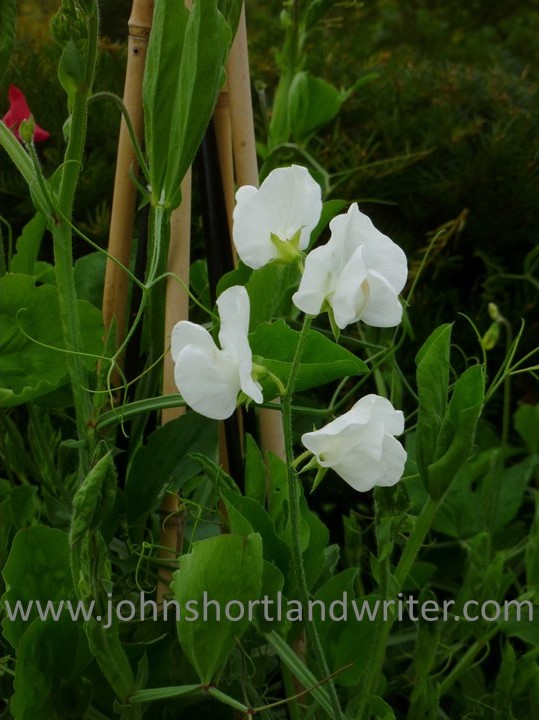
Despite its name, the Chelsea Chop isn’t the latest trend in hair styling although trimming the unruly and the straggly certainly is involved. It is a very simple and straightforward method of cutting back herbaceous* plants which, for some reason, terrifies even the most confident of gardeners.

Sedums (foreground) growing at Lytes Cary Manor

The only skills required are courage and the knowledge of exactly when to carry out the chop. The latter is simple to calculate and is hinted at by the title of the deed – the week of the Chelsea Flower Show or thereabouts. This year, there have been two hiccups in using this rule: firstly, the show has been moved to autumn because of Covid restrictions and secondly, because spring has been so slow in coming that plants are behind with their growth. As a general rule of thumb, the time for cutting is around the third week of May.

The flat flowerheads of sedum are made up of hundreds of tiny star-like florets

Beloved by bees and butterflies, Sedum – also known as Ice Plants on account of their fleshy, cool-to-the-touch leaves – are the ideal candidate for the chop and one of the most satisfying to do. Inevitably, when left to their own devices, the large, flat flowerheads are too weighty for their stems and they topple over to sprawl across the ground and spoiling an otherwise impressive display.

Sedum, the Ice Plant, frequently collapses & looks ugly just as it flowers

To make the chop all that has to be done is to cut through every growing stem, thereby reducing the plant’s overall height by half to one-third. Clear away the prunings (which can be added to the compost heap) so as not to attract slugs. There, I told you it was simple!

Sedum given the chop. Don’t forget to pick up all the prunings!

Although the method sounds and looks drastic the plants quickly recover and make new growth. The end result will be a plant that doesn’t collapse and doesn’t require staking. Admittedly, the flowerheads will be smaller than before but they produce so many more than they would have done left unpruned that the effect is in no way diminished.

Numerous flowerheads appearing on the now tight growth of Sedum two months after the Chelsea Chop

This simple pruning technique can be used on a number of other plants too in exactly the same way. The taller achillea, phlox, campanula, asters (michaelmas daisies) and rudbeckias are all good candidates. I have heard of its use on echinacea (cone flower), penstemon and helenium but, in my experience, these are trouble-free plants anyway, so why bother? The secret to good, stress-free gardening practice is to find the balance of what suits you and what suits the plant. The Chelsea Chop on sedum in May prevents an awful lot of stress later in the year!

top left – clockwise: achillea, campanula, aster, rudbeckia. They can all be given the Chelsea Chop

*herbaceous – a non-woody plant that dies back and becomes dormant in winter to regrow each spring

Advertisement

Growing Sweet Peas – the lazy person’s guide

Imagine it is mid-summer, the morning sun is warming the day and you are gathering handfuls of pretty, multi-coloured and fragrant flowers to bring back into the house.  If this sounds like a heavenly dream then read on.  The dedicated gardener will need no further encouragement to grow sweet peas but for those less keen on gardening or with little time, they are still the perfect choice.

So, even if your idea of gardening is to sit in it with a glass of chilled, white wine, there is a quick and easy way to grow sweet peas for, at this time of year, pots of young seedlings are available from garden centres.  They are usually grown in a single pot with a dozen or more plantlets crowded together.  They nearly always come as a mix of colours but it is necessary to check that they are a tall-growing and scented variety.  Avoid buying the scentless and/or dwarf types, both of which I dislike intensely – why grow these when they should be fragrant and elegant?

Sweet Peas (3) copyright

Sweet peas grown informally on a ‘wigwam’ in the garden border

If the weather is reasonable and the soil not frozen, the seedlings can be tipped out of their pot, teased gently apart and popped in the ground about six inches (15cms) apart.  It is beneficial to make sure that the soil in the pot is moist so give them a good drink an hour or so before planting.  Sweet peas, being climbers, need something to clamber up: the traditional way are hazel sticks. These are ideal for the sweet peas attach themselves readily to the rough and twiggy stems.  If hazel cannot be found, bamboo canes also work well although the young plants may need a little helping hand at first to attach themselves – use any short twigs for this just to prop them up.  The canes, which are traditionally placed into a circular ‘wigwam’, need to be about 7-8ft long so that once in the ground they are about 6ft tall.  Apart from keeping them watered in dry spells and free from slugs and snails that’s it.  They will begin to flower in June and continue (providing you pick them regularly and never allow them to set seed) until the autumn frosts.  Incidentally, they grow well up fences too providing they get adequate sunshine.

Sweet Pea copyright

For more experienced gardeners and those that want to enter the local flower show try growing them as ‘cordons’.  With this method they are grown in straight rows on bamboo canes or strings to a height of 5ft.  A place in the vegetable garden is ideal as they can be readily accessed from all angles without treading on other plants.  The spacing is again six inches apart.  For the best blooms, remove the tendrils and any side shoots as they appear, also any flower stems with less than four flower buds. With no tendrils for self-clinging it will be necessary to tie the plants to the stakes with string or by using metal rings sold especially for the purpose.  When the plants reach the top of the canes and/or the flower quality diminishes, cut the plants free of their stakes and lay them carefully along the ground. Tie in the growing tips to their nearest stake and train as before.  The plants will flourish having been given a new lease of life.

Sweet Peas copyright

These sweet peas, grown as cordons, are now ready for layering

Sweet Peas (2)

The layering process

Sweet peas are readily grown from seed, either sown in pots or the ground in March/April or in pots in October.  I prefer to start them in individual pots regardless of the time of year and to protect them from the worst of any cold weather.  The seed does have a hard coating and many gardening books advise chipping the individual seeds with a knife.  Not only is this hard work and time consuming, I have never found it to be necessary.  The seed is both plentiful and inexpensive and if a few don’t germinate does it really matter that much?

The growing and exhibiting of sweet peas reached a peak in late Victorian and Edwardian times with many specialist clubs holding shows.  With patience and luck, who knows you may become a medal winner at your local flower show?  Even if you don’t, you’ll be rewarded by a garden full of colour and a house full of scent.

Book Cover

There is lots more no-nonsense advice for gardeners in my book “Why Can’t My Garden Look Like That?”  To take a peek inside the covers, click here.

On Tulips

The story of the craze for tulips in the 17th century, Tulipomania, is well documented and oft repeated.  Suffice to say, that favoured, single tulip bulbs were selling for thousands of pounds/dollars before the tulip ‘bubble’ crashed.  Today, we are fortunate in having many hundreds of varieties in an unimaginable range of colours and forms to choose from and at remarkably low prices.Hidcote - tulips in the Old Garden copyright

Over the years, my work has taken me to gardens of all sizes and styles, from formal parterres attached to country estate houses to ‘pocket handkerchiefs’, to planting thousands in grassland to planting a score or less in pots.  It has given me the opportunity to experiment with colour as well as variety.  Below are some of my favourites.

Hidcote (11) copyright

The formal parterres of this Victorian Italianate garden (by Charles Barry, designer of the Houses of Parliament) required very restrained planting both in colour and quantity.  Here, I used the variety ‘Spring Green’, which stands well even in harsh weather conditions. After flowering, the bulbs were lifted and dried off to be replanted again later in the year.  It is always desirable to do this as it helps to prevent disease and deterioration of the bulbs.  In practice, it is often easier just to leave them and add a few additional bulbs each autumn to bulk up the numbers, especially when time is short.Kiddington Hall 2001 copyright

Also in a large estate garden but at the opposite end of the style and colour spectrum, three thousand red (‘Bing Crosby’) and white (‘Diana’) tulips were planted on a meadow bank.  Tulips when planted in grassland deteriorate very rapidly – to maintain this display new bulbs were added each year.  However, they do look very beautiful when grown this way – try the almost black tulip ‘Queen of Night’ with blue Camassia bulbs for a magical combination.Tulips bing crosby & diana in grass copyright

Even when planting smaller beds, cramming in as many bulbs as is possible between other plants makes for a beautiful display.  This stunning border was only one metre wide and four in length but there was still room to have plenty of early colour from ‘Purple Prince’ and the lighter ‘Candy Prince’.Tulips Purple Prince & Candy Prince copyright

For formal displays a bed of tulips takes a lot of beating.  They can be single coloured as in this image of pink tulips under-planted with yellow wallflowers (seen at Glasnevin Botanic Gardens in Dublin, Ireland) or mixed colours and planted so densely that no other plants were necessary or desirable (seen at Lismore Castle, Ireland).Tulips - pink copyrightTulips Lismore Castle copyright

For those of us with limited space and budgets, tulips grown in pots are ideal for we can still cram the bulbs in to give a magnificent display.  The images below show how the first layer of bulbs are placed before a second layer is planted above them.  Avoid planting directly over the first bulbs by leaving their tips showing – this will give the bulbs space to develop with much better results.  Top up the plants with potting compost and nature will do the rest; it couldn’t be simpler!  I like to use the more ‘exotic’ looking varieties in pots as the blooms, by being lifted closer to the eye, give more opportunity to admire their spectacular detail.Planting tulips copyrightPlanting tulips in pots copyright

Perhaps the easiest of all tulips to grow are the wild species* and their varieties.  Their delicacy of size belies their toughness.  If they like you, they will increase in number year after year.


Tulipa 'Peppermint Stick' copyright

Tulipa ‘Peppermint Stick’


Tulipa acuminata copyright

Tulipa acuminata

All tulips benefit from being planted as late in the year as possible, November is ideal but even if later they will still flower.  The pot grown ‘Green Eyes’ were planted mid-January this year and have just finished flowering.  They will be planted in the garden in due course to flower again next spring.

Tulip 'Green Eyes' copyright

Tulip ‘Green Eyes’


In England, tulips are flowering at their best right now: take the opportunity to visit open gardens to see which ones you like best.  Make notes of their names so that you can order the bulbs when the catalogues drop through the letter box mid-July.

*always ensure that any bulb is purchased from a reputable source and have not been gathered from the wild.