Winter Pruning of Limes, Hazels & Dogwoods

Hard pruning takes courage and gardeners are often reluctant to carry it out for fear of harming or, even worse, killing the plant. Once it is understood that more trees and shrubs are lost through neglect than by pruning the task becomes somewhat easier. In far too many gardens woody plants are grubbed out because they have outgrown their allotted space when judicious pruning at an earlier stage of their life would have allowed them to thrive and give pleasure for many more years.

Outgrown its space? Don’t remove it, prune it!

January and February are the perfect months for carrying out coppicing and pollarding and some shrubs like willow and dogwoods, grown for the winter colour of their bark, are actually improved by the process. Coppicing and pollarding are traditional techniques that have been carried out for centuries in woods and forests to provide a plentiful supply of fuel and fencing materials. As with all procedures, jargon evolves and coppicing and pollarding are just words that describe the removal of branches back to the tree trunk (coppicing) or, in the case of pollarding, the removal of stems to ground level. Somehow, if you just say to yourself, “cut off every branch” the mystery of the process disappears and becomes less intimidating.

Willows – some newly pollarded line a riverbank

Limes (Tilia) are very beautiful when grown as full-sized trees but become far too large for most gardens. They are better planted as parkland trees in a field, if you are lucky enough to own one, where there stature and grace can be appreciated from a distance. Too often they are grown where their branches overhang driveways where they drop their sticky honeydew over vehicles and become a nuisance. Most limes are host to tens of thousands of aphids (greenfly) which feed on its sap and then secrete the unwanted waste. Somehow, the gardener’s jargon word ‘honeydew’ sounds so much nicer than ‘greenfly crap!’ If you are determined to plant a lime tree in a confined space the Caucasian Lime, Tilia x euchlora which doesn’t have this problem is the one to go for. Remember that any tree in a confined space will need its size controlled so read on to find out how to pollard it.

Limes, when mature, are beautiful but very large trees

The time to pollard a tree is winter and January, when there isn’t too much to do gardening-wise, is the perfect month. I always aim to complete by the 31st which allows time to continue into February, if need be. By the middle of that month the sap will be starting to rise within the tree so it is sensible to complete the task by then. It is very straightforward to remove the branches for which you will need secateurs for smaller twigs, loppers for larger ones and a sharp pruning saw for anything bigger still. Which tool to use when? That too is easy to know. Secateurs and loppers should cut through the stems easily – if you need to twist the tool or the stem, you should be using the saw.

By midsummer there is plenty of new growth on this old willow pollard

Common sense will tell you that if you remove all branches from a tree there will be nothing left to offer any screening. This isn’t always important and coppiced trees send out new growth very rapidly as the weather warms up. However, for privacy or a different ornamental effect more careful pruning is required. All that needs to be done is to cut back any branch or twig that has grown beyond the space you have allocated for it.

A pollarded lime allee provides drama and a focal point
This lime allee has had its side branches retained to give denser summer screening

Limes are not often grown for the colour of their winter twigs probably as they are up rather high and so less noticeable. Willows (Salix) (when coppiced, for they can also be pollarded) and dogwoods (Cornus) are very different for their bright yellow, orange or scarlet stems are very visible and a mainstay for any winter garden. They are also quite simple to prune as it is all carried out at ground level. When the plants are mature, I prefer to cut them over a three year period as this retains their overall height. Quite simply, it means that only a third of the stems are removed or, if you have plenty of shrubs, completely prune one in every three to their base. The purpose behind this pruning is not so much to control their size but to maintain the strength of colour which is at its best on younger shoots. If left, they gradually become quite dull.
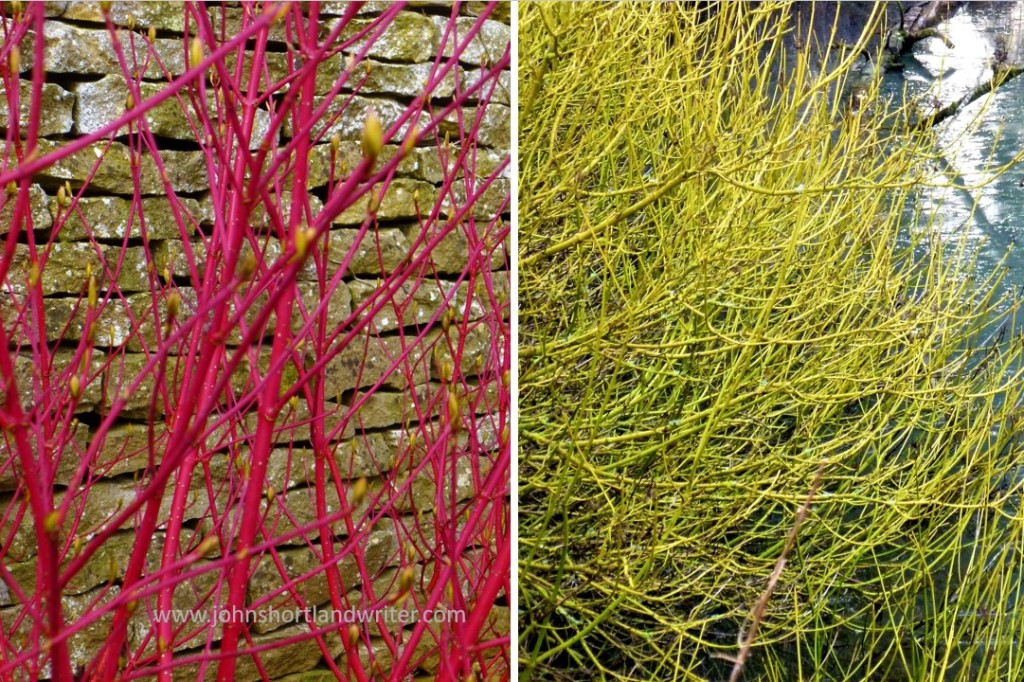
The coloured stems of dogwoods

Hazels are treated very much like willows and dogwoods, although the usual purpose is purely to maintain a convenient size or to provide ‘pea sticks’ to be used for supporting summer plants as well as peas and beans. For guidance take a look at my earlier post from 2021 which can be read by clicking on the link here.

A hazel tunnel is created by partial coppicing to reduce the number of tall stems

In Need of Winter Cheer – and how to get it

With the long, dark nights now upon us (and the gloomy daily news) we could all do with a little cheer to take us forward.  It isn’t too late to take a small step towards obtaining it for there is nothing quite like flowers in the house to lift the mood.  Now is a good time to plant bulbs for indoor flowering.  The choice is surprisingly large and some can have quite exacting growth requirements but the simplest of these – that anyone can succeed with even if they don’t have green fingers – is the sweetly scented, white-flowering Narcissus Paperwhite.

The delicate looking bloom of the Paperwhite Narcissus

Unlike the majority of Narcissus (Daffodils) they do not require a period of complete darkness to encourage them into growth.  In fact, they do not even need to be planted for they will happily flower just anchored in a bowl or pot of gravel that is kept moist.  However, I think they are better planted in potting compost and look far more aesthetically pleasing.  I never bother with special bulb fibre that is sold for the purpose mostly because I tend to have half-open bags of compost kicking around the place that need to be used up.  If you plant the Paperwhites now and bring them straightaway into the house they can be in flower in six to eight weeks.  Those in the photos below were placed in our conservatory and, with the unanticipated warmth from a week of late autumn sunshine which accelerated their growth, have come into flower in just three weeks from planting.  So much for having them in bloom over Christmas!

Note the use of twigs to provide natural looking support

The secret to the planting is to cram as many bulbs as you can into the pot, either in a single or double layer.  If choosing the latter don’t plant directly over one another but stagger them a little so they all have freedom to grow without struggling to push past.  The bulbs in the glazed earthenware pot here were planted in a single layer all touching one another – that way I was able to squeeze in twenty-eight bulbs into a container measuring just twelve inches in diameter. 

Put as many bulbs in the pot as you can squeeze in

Paperwhites have a tendency to flop just when they look their best and the quickest way to prevent this is to push twigs into the compost.  If you do this at the time of planting or very soon after the plants grow strongly through them and look far more natural than when you try to rectify it once they have collapsed.  It is also far less fiddly than using canes and string and looks more natural too.

I have always found hyacinths far more difficult to grow well although I know plenty of people who never seem to have any trouble whatsoever.  They need to be kept in darkness until the flower bud just shows.  I have found them to be rather erratic with their growth and, in the days when I had to provide huge displays for the big country houses I worked for, I grew them in individual, small pots.  By growing more than I really required I could select those of matching height, remove them from their pots and then replant them into the display pots.  They never failed to impress and I never let on how I managed to get such a uniform display!  Far easier are the little grape hyacinths, Muscari, growing here in a glass bowl – an idea I copied after I was given them one year as a gift.

Grape Hyacinths are often sold under the name Muscari

Perhaps one of the loveliest bulbs I have planted in recent years is the miniature iris, Iris ‘Sheila Ann Germaney’ (I have spelt that right!).  Once, again, very easy to grow – just keep them in the dark until they start to grow and then bring them indoors.  After they have finished flowering they can be planted in the garden where they will flower each spring for many more years.

Iris ‘Sheila Ann Germaney’
The Iris’ beautiful markings can be more readily admired when they are indoors

Amaryllis or Hippeastrum are spectacular giants that aren’t to everyone’s taste.  I’m not too keen on them as an individual plant grown on a kitchen window sill although they will bloom there quite happily.  I prefer to use them as cut flowers and for this I tend to grow them in a greenhouse, although a light windowsill would work just as well if you have the space.  They are very straightforward, do not need to be kept in the dark and are often sold complete with pot and compost in gift boxes.  When used as I suggest, several stems placed together in a tall vase look superb.

home-grown Amaryllis used as a cut flower

I have found tulips to be less successful as indoor bulbs although the shorter types should work; I’m just not very keen on those so have never bothered to try.  However, if you have an unheated greenhouse that lies idle through the winter plant the exotic double types there.  Protected from the worst of the cold and rain they flower weeks earlier than normal and can be harvested as exceptionally beautiful cut flowers.

I find tulips for indoors are best grown as flowers for cutting

The secret to indoor bulb growing, as with all forms of gardening, is to experiment and find what works best for you.  Over the years, I have tried all sorts, some surprisingly successful and some, if not quite disasters, they certainly weren’t worth bothering with a second time.  With success, you will have an endless supply of colour and scent for your home and, of course, they make great Christmas and birthday gifts.  This last sentence also gives me the excuse to remind you all that my book Why Can’t My Garden Look Like That?  is still available from Amazon or through booksellers and also makes a great gift!  In it you will find all sorts of hints and shortcuts that I used during my years as a Head Gardener when it was essential that the displays both in the house and the garden were as good as they could be.  Happy bulb planting!

A perfect gift!

Old Yew, New Yew, Renew Yew

Although in the UK the yew tree (Taxus baccata) is often called English Yew it is, in fact, very widespread in its distribution growing throughout Europe as well as parts of Africa, Iran and Asia. It can live to a great age and there are several, mostly growing in churchyards, that are thought to be a thousand or more years old. One such tree grows in the Chiltern village that I lived in before moving to the Cotswolds; it is enormous having a girth of over 5.5 metres.  Despite being a British native that has grown naturally in the wild for thousands of years, yew woods are very rare – I can only think of two (although there must be others): one in the Chilterns behind Watlington Hill and the other in Sussex.  One of the reasons for this is that yew was the favoured timber for making longbows – by 1294 yew stocks were so depleted that imports were being sourced from mainland Europe.

yew forest

The yew forest at Kingley Vale, Sussex, England – one of the finest examples of this rare habitat in Europe [photo credit: Ben Shade]

Yew watermark

The huge girth of the ancient yew in the churchyard at Ibstone , Chiltern Hills, England

Yew is unusual in that the individual plants can be male, female or a combination of the two.   All-male trees release huge clouds of pollen whereas all-female produce none and can be identified by their glowing red berries.  It has even been known for individual trees to gradually change sex with all-male specimens becoming all-female and vice versa.  Although the pollen clouds can be extremely irritating if caught in one, in the average garden situation where mature trees are less likely to be found the pollen release is much more limited.

Swerford Park - Yew Berries(11) watermark

The glossy red flesh is the only part of yew that is non-poisonous. It’s still not advisable to eat it!

In its natural condition yew is a spreading, evergreen tree, wider than it is tall.  However, for many centuries it has been clipped and shaped into hedges and topiary for which its regular, and when treated in this way, tight growth makes it ideal.  It responds well to being kept low, say around 45cm, or can be stopped at any height required.  Likewise, it can be clipped into neat cubes, intricate spirals as well as the ubiquitous peacock beloved by stately homes.

Hidcote (6) watermark

Yew topiary at Hidcote, Cotswold Hills, England

Yew Topiary watermark

Intricate yew topiary at Farmleigh Gardens, Dublin, Ireland

One of the characteristics of yew is its ability to send out new growth from old branches and even from its trunk.  This can be readily seen when the branches are parted or the main stems are exposed.  To maintain a clean trunk these growths should be pruned away before they become established.  With hedges and trees it means they can be reduced in size as drastically as you might wish although it is important to bear in mind that a heavily pruned tree may never be restored to a thing of beauty.

Yew (2) watermark

Yews ability to regenerate from old wood means that it can be pruned as hard as you dare

If reshaping trees is a skill difficult to master, restoring overgrown or gappy yew hedging only takes courage although for best results it may take a few years to achieve perfection.  Begin this process by removing all growth back to the trunk on one side only.  The hedge will now look ugly but new growth will soon sprout and the following year or in year three the other side of the hedge can be given the same treatment.  Apart from the benefit this staggered pruning has to the health of the yew another advantage is that the screening from the unpruned side means there is no loss of privacy.  The height of the hedge can also be reduced at the same time as side two cutting 6-12 inches below its required finished height to allow for regrowth.  By year five, if not sooner, the hedge will be a manageable, healthy screen once more and will continue to be so for very many years.

Yew Hedge Regeneration watermark

The first stage in regenerating an old yew hedge

As with all plants, especially those that are long-lived, careful planting is essential to give them a good start.  Yew copes with most soil types including chalk but hates waterlogged or compacted soils.  Whatever the soil, enrich with good quality compost or well-rotted manure; if any parts are excessively damp create a low bank at least six inches high to ensure the roots establish in the marginally better drained soil.  Pot-grown yews can be planted at any time of the year providing the ground isn’t frozen; the best time is mid-autumn and spring when the soil is warmer. The optimum size for quick establishment is 2-3 feet and this size also makes planting a hedge quite economic too.  With a bigger budget larger plants may be purchased.  These in the photo below are over six feet high and create an instant hedge when planted closely together.  Because of their size they are usually ‘root-balled’ and only available during the cooler months.  The hessian and wire mesh root ball should be left intact as they quickly decay once planted although the wire collar may be released if it fits too snugly against the stem.  In windy situations they may require staking; they will certainly need careful watering for the first two years of their life.

Secret Garden (4) watermark

Rootballed yew waiting to be planted – they will make a fine, if somewhat costly, instant hedge

However you chose to use your English Yew, whether as hedging or as topiary, there is one common rule to clipping and that is accuracy for nothing looks worse than a formal hedge or piece of topiary that does not have clean, sharp lines.  The ideal time for clipping is August although spring is the time for restoration pruning.  One word of caution – all parts of yew are highly toxic if ingested.  It is essential that clippings are disposed of carefully for it can be fatal if livestock such as horses have access to them.  Yew clippings from regularly clipped hedges can be sold for use by pharmaceutical companies to make cancer treatment drugs.  In the past, when I was the Head Gardener of a large country estate with extensive yew hedging, we secured a not-inconsiderable amount of money over time which the estate donated to cancer research charities.  I believe that, for 2020, collection has been suspended but hopefully it will be resumed in future years.

Kiftsgate Court (4) watermark

A beautifully clipped yew hedge creates the perfect backdrop to any garden – Kiftsgate Court, Cotswold Hills, England


How To Grow Tomatoes With Little Effort

It may seem odd writing about growing tomatoes at the time you should be harvesting them but it is often the case that when you see a plant growing somewhere that is the time you wish you knew how to grow them.  As regular readers of my garden articles will know, although I love gardening I also like to achieve great results with the minimum of effort and tomatoes are not an exception!  Effortless gardening doesn’t mean bad horticultural practice for you can hardly expect great results from shoddy workmanship wherever your interest lies.  All the photographs below demonstrate that it is possible to have superb tomatoes without devoting every spare moment to growing them.

Tomato 'Moneymaker' watermark

Perfect tomatoes can be grown quite easily using my method

As is often the case, I discovered this easy way to grow tomatoes out of necessity: a client wanted them but they only visited their country house irregularly and I could only devote one day a week to maintaining their grounds.  That left about fifteen minutes a week for the tomatoes.   This method, by the way, only works for plants grown in containers.  Although they were grown in a greenhouse there is no reason why the same method could not be used for growing in pots outdoors although they are more at the mercy of the usually variable British summer weather (not variable this year, 2018!).

Tomato 'Golden Sweet' watermark

Tomato ‘Golden Sweet’

All garden plants, whether grown in containers or in the garden border require good growing conditions and this starts with getting the soil or potting compost right.  Tomatoes are greedy feeders and books and articles always advise feeding the plants on a regular basis as soon as the first flowers show signs of turning into fruit.  That is far too time consuming for my fifteen-minute rule!  Instead, use a quality compost.  I used Carr’s potting compost which is made from composted farmyard manure; although not the cheapest it is well worth paying the extra cost for the results that are obtained.  There are, of course, other manufacturers that do something similar which, I daresay, will achieve similar results.  To this compost I mix in several handfuls of horticultural grit and double the recommended amount of water-retaining granules – these swell upon contact with water, and release it gradually thereby reducing the necessity for regular watering.

Tomato 'Cherrola' F1 watermark

Tomato ‘Cherrola’

Tomatoes are easy to grow from seed, sowing in gentle heat in February and there is a huge choice of variety.  For ease and speed, I purchased young plants from a garden centre once I had no concern of late frosts killing them.  The pots were filled to within a couple of inches of the brim with the compost mix which I had pre-moistened.  As a guide, the compost should feel damp but you shouldn’t be able to squeeze water out of it.  Plant three tomatoes in a 20/25 litre plant pot placing a sturdy cane by each plant.  Stand the pot on a watering saucer or tray and water well.  Gardening rules state that tomatoes don’t like standing in water but I found that by using the saucers I could leave them with a good supply to last them the week.  By the time of my next visit, the compost and tray were dry but the plants unaffected by either the standing water or the drought.

Tomato 'Tigerella' watermark

‘Tigerella’, an heirloom variety of tomato with striped fruits

Tomatoes grow in two different ways depending upon the variety – bush or cordon.  With bush tomatoes you just leave them to grow as they will; with cordons it is recommended that you remove side shoots and tie the plant upright onto the cane.  Although the latter method sounds time consuming and fiddly it is a simple and quick task once it’s been mastered.  The secret is to remove any shoots that grow out of the union of the leaf stalk with the main stem – if done early enough they snap off with the fingers.  If you leave them they will need to be cut out with a knife or scissors.  Although it is possible to leave them in situ I find that the plants become very congested and difficult to manage which, in the longer term, means they are more time consuming to deal with.

Tomato 'Sungold' watermark

Tomato ‘Sungold’ – note how the plant has been ‘stopped’ when it had grown as tall as I wanted it to be.

And that’s it!  Just tie the plants to the cane as they grow and give them a really thorough watering once a week from the top of the compost until the saucer begins to overflow.  There’s no time-consuming feeding for the compost will provide all the necessary nutrients. And because the plants are growing strongly and healthily you are far less likely to be bothered by pests or diseases.  All the tomatoes in the photographs received no chemicals or other additives; all we had to do was to eat them.  If you’ve never tasted a home-grown tomato eaten the moment it is plucked from the vine then you’re in for a real treat!

Tomato Big Boy 1979 watermark

A photograph from 1979!  Tomato ‘Big Boy’, a beefsteak variety living up to it’s name!

Thinking Outside the Box(wood)

Over the years I must have hand clipped many miles of box (in the USA, boxwood) hedging and once the knack is mastered it can be quite therapeutic.  The main rule to follow is to remember that it has to be precise for there is nothing worse than a straight, level hedge that is clipped unevenly.  It irritates the eye as much as a picture hanging crookedly on a wall.

Box Hedge Clipping (2) watermark

Patience and plenty of time are key factors in ensuring straight lines

I can’t say that I feel quite the same about topiary.  I can admire the craftsmanship that goes into producing weird and wonderful shapes but it is so easy, in a lapse of concentration to, say, cut the ear off a teddy bear or the beak off a peacock.  As a consequence, I find it rather stressful.  Cloud topiary is far more forgiving but, again, it doesn’t really “do it for me.”

Box Cloud Topiary watermark

You need even more patience to clip topiary

Perhaps the most rewarding design I have created was turning four rather scruffy and unbalanced squares of box into simple but elegant cubes.  Yes, it was topiary but to misquote Star Trek “it’s topiary Jim, but…”  To begin with, I was faced by the four squares each with a rather ugly and thorny shrub rose growing out of their centres.  A consequence of this design was that the box couldn’t be clipped properly and neither could the rose be properly pruned.

Box Hedge Clipping watermark

The original design with roses always looked scruffy

To create the design the roses had first to be removed leaving a gaping hole in the centre of each square.  Fortunately, I had some reasonably tall box plants elsewhere in the garden that I could dig up and replant.  I soon discovered that it was impossible to plant them properly without damaging the existing plants.  My gamble of just standing them on the earth and then throwing topsoil over them to trickle through the branches paid off.  The soil covered the roots and probably much of the lower branches too*.  Given a good watering, the plants thrived.  Before trimming  all the outer edges needed to be marked with string lines for accuracy in cutting.

Box Hedge - Copy watermark

Without strings for guidance clipping the box into perfect cubes would be almost impossible

I thought about all sorts of fancy designs for the tops of the cubes and, as is so often the case with design, I decided that simplicity was the key to a satisfactory outcome.  Two cubes would have a raised circle and two a raised square.  It was essential that these weren’t too high – I didn’t want them to look like a combination of wedding cakes and pimples!  I found that it was impossible to mark these designs out and so they were created without guidelines, relying on my eye to tell me where and what to clip.  By their second year of clipping they looked as if they had been there for ever.

Box hedge Clipping (10) Year 2 watermark

The design will look just as good in winter when highlighted by frost or snow

Box is such a versatile plant to use and it is well worth experimenting with them.  Below are three photos of how I have used them: the first is the classic edging to a border; the second to bring focus to a set of garden steps; the third a mini-parterre to link two levels in a garden.  Your garden doesn’t need to be huge or grand to use box in these ways – the parterre was suitably small scale for a tiny town garden.  Have a go at creating your own box design – and if creating a topiary peacock is your thing, that’s fine with me – just don’t aske me to clip it!

Apricot & Blue watermark

The classic use for box – fronting a border

Box Topiary watermark

Giving focus to garden steps

Box Parterre watermark

Mini-parterre for a tiny garden


*This is also a good and easy way to create plenty of new plants for the buried stems will often send out roots.  When they do they can be severed from the parent plant to be grown on elsewhere.

Growing Sweet Peas – the lazy person’s guide

Imagine it is mid-summer, the morning sun is warming the day and you are gathering handfuls of pretty, multi-coloured and fragrant flowers to bring back into the house.  If this sounds like a heavenly dream then read on.  The dedicated gardener will need no further encouragement to grow sweet peas but for those less keen on gardening or with little time, they are still the perfect choice.

So, even if your idea of gardening is to sit in it with a glass of chilled, white wine, there is a quick and easy way to grow sweet peas for, at this time of year, pots of young seedlings are available from garden centres.  They are usually grown in a single pot with a dozen or more plantlets crowded together.  They nearly always come as a mix of colours but it is necessary to check that they are a tall-growing and scented variety.  Avoid buying the scentless and/or dwarf types, both of which I dislike intensely – why grow these when they should be fragrant and elegant?

Sweet Peas (3) copyright

Sweet peas grown informally on a ‘wigwam’ in the garden border

If the weather is reasonable and the soil not frozen, the seedlings can be tipped out of their pot, teased gently apart and popped in the ground about six inches (15cms) apart.  It is beneficial to make sure that the soil in the pot is moist so give them a good drink an hour or so before planting.  Sweet peas, being climbers, need something to clamber up: the traditional way are hazel sticks. These are ideal for the sweet peas attach themselves readily to the rough and twiggy stems.  If hazel cannot be found, bamboo canes also work well although the young plants may need a little helping hand at first to attach themselves – use any short twigs for this just to prop them up.  The canes, which are traditionally placed into a circular ‘wigwam’, need to be about 7-8ft long so that once in the ground they are about 6ft tall.  Apart from keeping them watered in dry spells and free from slugs and snails that’s it.  They will begin to flower in June and continue (providing you pick them regularly and never allow them to set seed) until the autumn frosts.  Incidentally, they grow well up fences too providing they get adequate sunshine.

Sweet Pea copyright

For more experienced gardeners and those that want to enter the local flower show try growing them as ‘cordons’.  With this method they are grown in straight rows on bamboo canes or strings to a height of 5ft.  A place in the vegetable garden is ideal as they can be readily accessed from all angles without treading on other plants.  The spacing is again six inches apart.  For the best blooms, remove the tendrils and any side shoots as they appear, also any flower stems with less than four flower buds. With no tendrils for self-clinging it will be necessary to tie the plants to the stakes with string or by using metal rings sold especially for the purpose.  When the plants reach the top of the canes and/or the flower quality diminishes, cut the plants free of their stakes and lay them carefully along the ground. Tie in the growing tips to their nearest stake and train as before.  The plants will flourish having been given a new lease of life.

Sweet Peas copyright

These sweet peas, grown as cordons, are now ready for layering

Sweet Peas (2)

The layering process

Sweet peas are readily grown from seed, either sown in pots or the ground in March/April or in pots in October.  I prefer to start them in individual pots regardless of the time of year and to protect them from the worst of any cold weather.  The seed does have a hard coating and many gardening books advise chipping the individual seeds with a knife.  Not only is this hard work and time consuming, I have never found it to be necessary.  The seed is both plentiful and inexpensive and if a few don’t germinate does it really matter that much?

The growing and exhibiting of sweet peas reached a peak in late Victorian and Edwardian times with many specialist clubs holding shows.  With patience and luck, who knows you may become a medal winner at your local flower show?  Even if you don’t, you’ll be rewarded by a garden full of colour and a house full of scent.

Book Cover

There is lots more no-nonsense advice for gardeners in my book “Why Can’t My Garden Look Like That?”  To take a peek inside the covers, click here.

On Tulips

The story of the craze for tulips in the 17th century, Tulipomania, is well documented and oft repeated.  Suffice to say, that favoured, single tulip bulbs were selling for thousands of pounds/dollars before the tulip ‘bubble’ crashed.  Today, we are fortunate in having many hundreds of varieties in an unimaginable range of colours and forms to choose from and at remarkably low prices.Hidcote - tulips in the Old Garden copyright

Over the years, my work has taken me to gardens of all sizes and styles, from formal parterres attached to country estate houses to ‘pocket handkerchiefs’, to planting thousands in grassland to planting a score or less in pots.  It has given me the opportunity to experiment with colour as well as variety.  Below are some of my favourites.

Hidcote (11) copyright

The formal parterres of this Victorian Italianate garden (by Charles Barry, designer of the Houses of Parliament) required very restrained planting both in colour and quantity.  Here, I used the variety ‘Spring Green’, which stands well even in harsh weather conditions. After flowering, the bulbs were lifted and dried off to be replanted again later in the year.  It is always desirable to do this as it helps to prevent disease and deterioration of the bulbs.  In practice, it is often easier just to leave them and add a few additional bulbs each autumn to bulk up the numbers, especially when time is short.Kiddington Hall 2001 copyright

Also in a large estate garden but at the opposite end of the style and colour spectrum, three thousand red (‘Bing Crosby’) and white (‘Diana’) tulips were planted on a meadow bank.  Tulips when planted in grassland deteriorate very rapidly – to maintain this display new bulbs were added each year.  However, they do look very beautiful when grown this way – try the almost black tulip ‘Queen of Night’ with blue Camassia bulbs for a magical combination.Tulips bing crosby & diana in grass copyright

Even when planting smaller beds, cramming in as many bulbs as is possible between other plants makes for a beautiful display.  This stunning border was only one metre wide and four in length but there was still room to have plenty of early colour from ‘Purple Prince’ and the lighter ‘Candy Prince’.Tulips Purple Prince & Candy Prince copyright

For formal displays a bed of tulips takes a lot of beating.  They can be single coloured as in this image of pink tulips under-planted with yellow wallflowers (seen at Glasnevin Botanic Gardens in Dublin, Ireland) or mixed colours and planted so densely that no other plants were necessary or desirable (seen at Lismore Castle, Ireland).Tulips - pink copyrightTulips Lismore Castle copyright

For those of us with limited space and budgets, tulips grown in pots are ideal for we can still cram the bulbs in to give a magnificent display.  The images below show how the first layer of bulbs are placed before a second layer is planted above them.  Avoid planting directly over the first bulbs by leaving their tips showing – this will give the bulbs space to develop with much better results.  Top up the plants with potting compost and nature will do the rest; it couldn’t be simpler!  I like to use the more ‘exotic’ looking varieties in pots as the blooms, by being lifted closer to the eye, give more opportunity to admire their spectacular detail.Planting tulips copyrightPlanting tulips in pots copyright

Perhaps the easiest of all tulips to grow are the wild species* and their varieties.  Their delicacy of size belies their toughness.  If they like you, they will increase in number year after year.


Tulipa 'Peppermint Stick' copyright

Tulipa ‘Peppermint Stick’


Tulipa acuminata copyright

Tulipa acuminata

All tulips benefit from being planted as late in the year as possible, November is ideal but even if later they will still flower.  The pot grown ‘Green Eyes’ were planted mid-January this year and have just finished flowering.  They will be planted in the garden in due course to flower again next spring.

Tulip 'Green Eyes' copyright

Tulip ‘Green Eyes’


In England, tulips are flowering at their best right now: take the opportunity to visit open gardens to see which ones you like best.  Make notes of their names so that you can order the bulbs when the catalogues drop through the letter box mid-July.

*always ensure that any bulb is purchased from a reputable source and have not been gathered from the wild.

The Fortune in Your Garden

The garden in winter; not the place where many of us loiter.  Instead we race back to the house for a nice, warming cup of tea.  On the way, we catch the scent from the Mahonia bush that thrives year after year on neglect.  Hinting of lily-of-the-valley, it’s fragrant, primrose yellow sprays of flowers will continue to give pleasure until the spring, as will the white, winter-flowering honeysuckle.  We stop just long enough to pick a few sprigs of jasmine, also pale yellow, to put in a vase.  The list of so many of our favourite plants could go on and on.

jasminum-nudiflorum-copyright

Winter Jasmine, Jasminum nudiflorum

What do all these plants have in common apart from being easy to grow?  They were all collected by a dour Scotsman in the mid-nineteenth century, Robert Fortune.  Despite being garden favourites and he being heralded as one of the heroes of the Victorians his name today is all but forgotten.  Even more remarkable, his discoveries changed society’s values, values that we now take for granted.  And the cup of tea?   Before Robert Fortune’s expedition to China, tea was an expensive commodity drunk only by the privileged few; soon it was to become the everyday drink of the masses.

tea plantation copyright.jpg

Tea plantation

In 1843, having shown great ability as a plantsman, first in Edinburgh and then at Chiswick, Fortune was sent to China with the instruction to learn about the practice of using bonemeal and to collect “tea of differing qualities.”  Commissioned for twelve months with a salary of £100 plus expenses, he proved so successful that he travelled for almost twenty years.  Upon his arrival, he disliked both China and the Chinese intensely; their dislike of him (and foreigners, in general) was even greater.  They refused to tell him where to find plants.

Dicentra spectabilis   copyright.jpg

Bleeding Heart, Dicentra spectabilis, another Fortune introduction

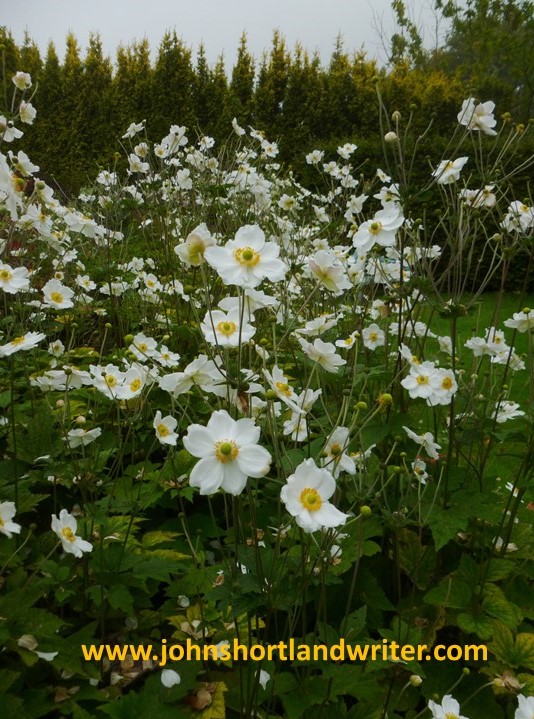
Fortune, although rude and unsmiling, was also brave and on numerous occasions had to fend off thieves and pirates.  Confined to his cabin, ill with a fever, his boat was abandoned and he was left to face his forty attackers singlehandedly.  Firing into their midst he survived both the attack and the fever and continued to Shanghai.  There he discovered the ‘Japanese’ Anemone, Anemone japonica, growing in great profusion on disturbed graves.  Now popular in the autumn border, anyone who has tried to eradicate it knows that the brittle root breaks to regrow in even larger numbers.  The graveyard story gave us ample warning of this.

japanese-anemone-copyright

Japanese Anemone

It is for tea that Robert Fortune really deserves greater recognition.  The gardens of the tea plant, Camellia sinensis, were closely guarded by the Chinese.  On a further expedition to China and disguised as a peasant, complete with shaved head and pigtail, he succeeded in sending over 100,000 seeds and seedlings to the East India Company.  It was the foundation of an industry that would create great wealth for both individuals and Britain and reinforced the British belief in Empire.

camellia-sasanqua-peach-blossom-copyright

Apart from the ‘tea’ camellia, Robert Fortune also introduced a number of ornamental varieties

The winter-flowering Mahonia was also collected at this time.  Believed to have magical properties it was almost unobtainable; in consequence, the entire stock of Mahonia in Europe and the USA descend from just three small plants.  During Fortune’s fourth and final visit to China, Japan in 1859 opened its borders for the first time.  One of the first Europeans to enter the country he collected large numbers of plants then unknown to Europe, including many types of chrysanthemum.

Mahonia x media 'Charity'   copyright.jpg

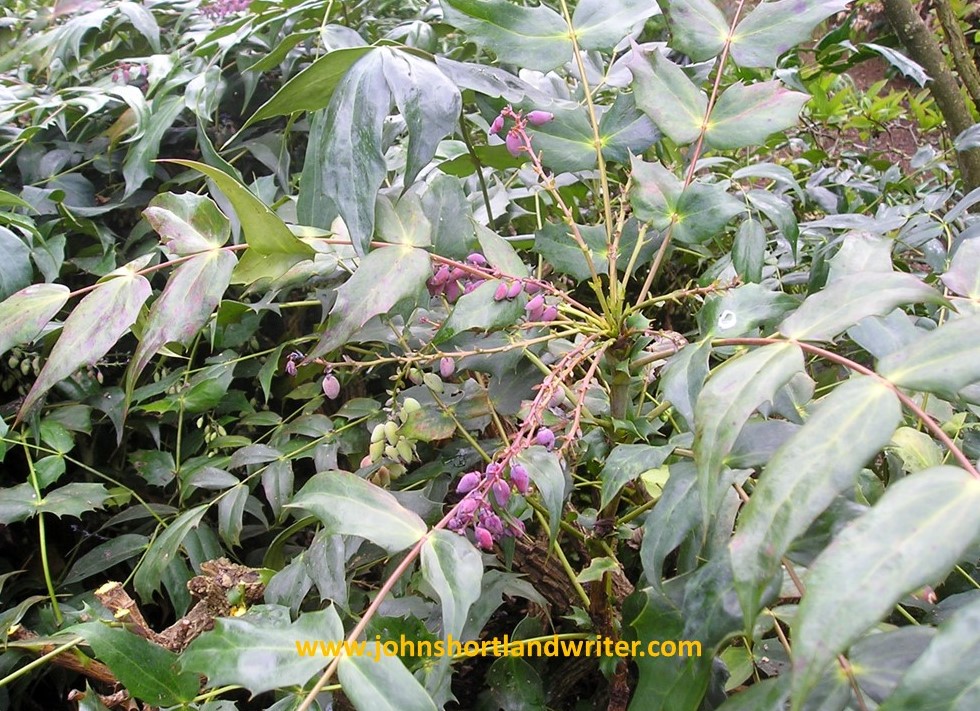
The purple berries of Mahonia appear after flowering

Robert Fortune’s legacy didn’t stop with the plants he introduced.  The wonder his plants created when exhibited in London established the international reputation of the Horticultural Society as the centre of excellence.  As the plants began to be distributed amongst the big, country estates the gentry started to take an interest in the growing of the plants themselves, something hitherto unknown.  Soon they began to assist and then direct their garden staff, culminating in the revolutionary style of Gertrude Jekyll.  Her approach is still a major influence on garden style and practice today.  This, in turn, led to even greater demand for plants.  To meet these needs, the horticultural industry worldwide is now a multi-billion pound industry.  Amongst the thousands of plant types propagated for sale each year, Robert Fortune’s introductions are amongst the most popular and enduring.

rosa chinensis 'mutabilis' copyright.jpg

Rosa chinensis ‘Mutabilis’ whose flowers start with a deep pink bud before slowly fading to apricot

recommended reading:

A Journey to the Tea Countries of China, Robert Fortune, 1852

Life in the English Country House, M Girouard, 1979

The Plant Hunters, T Whittle, 1970

The Plant Hunters, C Lyte, 1983

and, of course, Wikipedia

We Built a Pond – you can too!

Winter is an ideal time to create a pond and with it fast approaching now is the time to start planning.  Quite probably you have an idea where you want to place it but do think about its position carefully.  Falling leaves from trees is an obvious issue but some others aren’t until it is too late. Water always collects at the given lowest point; a pond perched on top of a mound will look ridiculous so check where the lowest point in your garden is and create the pond there, remodelling other sections of the garden, if need be, to tie in. bulrush-copyright

With our proposed pond site, we already had a large depression where garden rubbish and junk had been thrown for years.  Now overgrown with scrub, it needed careful clearing, including roots that may have punctured the lining.  If space is tight, the pond should have a planting shelf set several inches below water level, around at least one third of its edge; if space permits a graduated slope to the pond encourages plants to spread more naturally and, to my mind, is preferable.pond-build-1-copyright

If access allows, it is sensible to hire a digger to create the pond for even a small one involves a lot of digging and moving of soil.  In the past, the mound was often left behind with a few rocks, or even worse, bits of broken concrete, to create a rockery.  This very rarely works well and it looks far better to have lawn leading down to the pond with possibly shrubs or other plants surrounding it.  Whatever the choice, it is important to have a seamless transition from water to garden.  Iris work well for this as there are varieties that will grow in shallow water and on the moist soil surrounding it; some reeds, too, will colonise the bank giving the pond that natural look.pond-build-3-copyright

When using a lining it is important to allow a decent overhang onto dry land.  In this photo, the lining has been cut a little on the tight side – the weight of the water pulled the liner down into position; it is better to trim the liner after the pond has filled.  Once that has been done the liner can be disguised by laying turf down the sides to just below water level.  Once grown, it creates a beautifully natural appearance to the pool.pond-lining-2-copyright

pond-build-4-copyright

In the spring, aquatic plants can be planted.  Oxygenating plants grow below water level and apart from being essential, make good cover for fish and insects from predators.  Marginal plants grow in shallow water and are used for lining the edges of the pool.  A thick planting of these are a good safety measure if small children are likely to visit, although they should never be allowed to do so unsupervised.  Water lilies grow in different depths of water so do make sure that the variety you choose is suitable for the depth of the pond. pond-5-copyright


Ponds, however large, never need to be exceptionally deep, rarely more than a metre and can be as little as 50cms.  Smaller ponds benefit from a deeper ‘hole’ so that fish can take shelter from the coldest weather.  It is worth remembering that the larger the pond the easier it is to maintain and keep healthy.  Finally, once the plants have established, fish can be added.  For a wildlife pond, ornamental goldfish should be avoided although some of our smaller native fish can be included.

koi-copyright

Koi Carp are best kept by enthusiasts!


It is always a surprise at how quickly new plantings grow in a garden and the pond is no exception.  The scars of our pond had healed within months and even after just a couple of years ponds can look as if they have been there for ever.  Now twenty years later, visitors to our garden find it hard to believe that the pond isn’t natural; it abounds with wildlife and there isn’t an inch of black butyl liner to be seen.pond-2-copyright

The pond featured here was built in the large garden of the house that I claim to be my birthright (joke).  Correspondingly, the pond also had to be large but the principles of pond design and placement are the same whatever their size.

To read about the bizarre coincidences that cause me to ‘claim’ the house click on these links:

The House My Parents Built – 200 Years Ago

Reincarnation – or just Coincidence?


Butterflies in the Garden

It is telling that when Richard South, the eminent entomologist, wrote The Butterflies of the British Isles in 1906 he stated that “half of our native butterflies are so widely distributed that the collector should secure nearly all of them in his first season.”  Today, that would almost certainly be impossible and, fortunately, the collecting of butterflies, along with the collecting of bird’s eggs, is largely a thing of the past.

Common Blue Butterfly   copyright

Common Blue Butterfly


Butterflies, as well as many other insects, have become increasingly scarce for the wildflower meadows that many rely upon for breeding success have been lost with changes in farming practice.  Since South’s day 97% of our meadows have disappeared either to the plough or by the use of fertilisers and chemicals to ‘improve’ the grassland.

Wild Flower Meadow   copyright

Pyramidal orchids flowering in a traditional meadow


Where wild flowers thrive – in protected meadows, organic farms and odd corners of the landscape – butterflies can still be found, although rarely in great profusion.  Gardeners can be of great help when it comes to conserving wildlife and by allowing some of our native species to grow in our gardens we are able to see a number of butterflies at close proximity.  I will shortly be writing an article on growing wild flowers in the garden so, as they say, watch this space…

Gatekeeper Butterfly (2)   copyright

Gatekeeper Butterfly on Wild Scabious


In the secret valley, we are fortunate in having a number of unimproved meadows and banks, deserted drove roads and flower-rich roadside verges, all of which means that butterflies readily come into our garden.  Even in town gardens a limited number of species will gradually appear and increase in number.

Roadside Verge   copyright

The wild Geranium pratense is common throughout the Cotswolds and readily available to buy as a garden plant too


One of the first butterflies to be seen on the wing in spring is the Brimstone.  Flying at the first hint of warmth, they lay their eggs on Buckthorn, Rhamnus cathartica, a spiny shrub that can be grown in the garden as a clipped hedge or allowed to grow freely.  Its citrus green flowers are followed by shiny black berries in the autumn.  In the image below the Brimstone is feeding from Ceonothus flowers, a popular garden shrub.

Brimstone     copyright

A common butterfly seen from mid-summer onwards is the Peacock, collecting in numbers to feed from Buddleia flowers.  This is such a popular shrub with butterflies that it is often known as ‘the butterfly bush.’  This Peacock is visiting Dame’s Violet, a scented herbaceous plant.

Peacock Butterfly   copyright

Another butterfly that visits buddleia is the Comma which has increased steadily in numbers in recent years.  The Comma can be readily identified by the shape of its jagged wings and the white comma mark that is visible on the underwing when the butterfly is at rest.  It lays its eggs on currants, hops, willows and nettles.

Comma Butterfly (2)   copyright

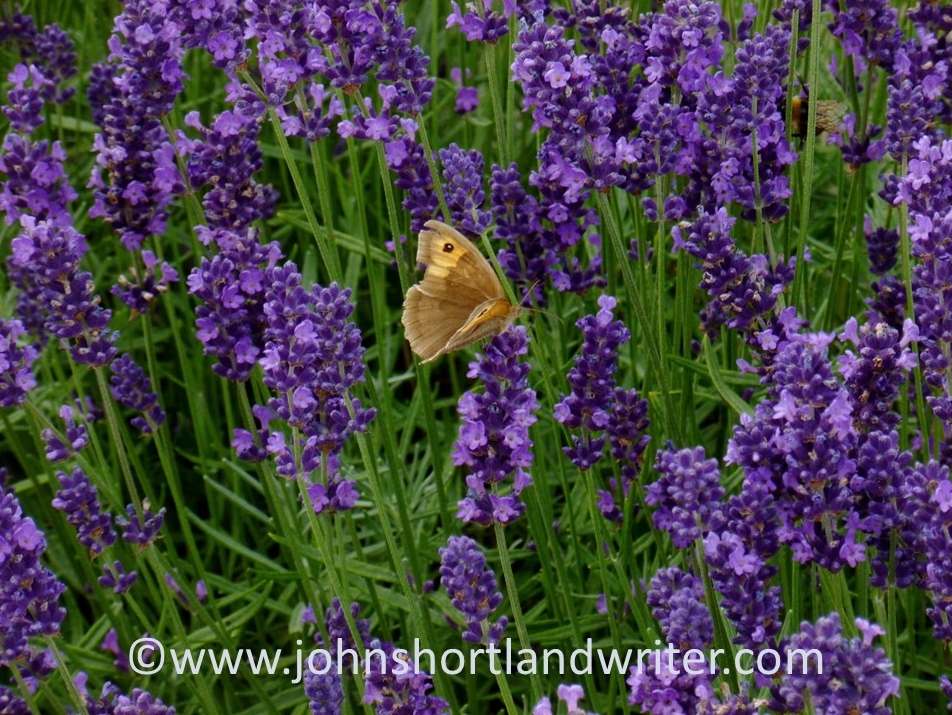
Not all butterflies are brightly coloured as those above and the Meadow Brown, in comparison, is quite drab. As its name suggests, it is found in grassland often in relatively large numbers and flying up from beneath your feet as you walk.  Not restricted to the countryside, keep an eye out for it in parks, cemeteries and gardens.  The photo below shows a female Meadow Brown resting on lavender; it can be identified by the orange markings on its wing.  Compare it with the all brown male feeding on achillea.

Meadow Brown Butterfly   copyright

Meadow Brown Butterfly - male   copyright

All butterflies fly in daylight but not all moths fly at night.  Moths aren’t always dull either: the day fliers can be very bright.  One of the most spectacular to be found in gardens in the south and west of England is the Scarlet Tiger.  Its caterpillars feed on a variety of plants including comfrey, honeysuckle and nettles.Scarlet Tiger Moth (2)   copyright

Want to know more?  The excellent website of Butterfly Conservation, the UK’s leading charity, has good identification pages for both butterflies and moths as well as a host of other information.  Better still, get out into the garden or countryside armed with camera and ID sheets.  Good butterflying!