Take Ten Roses

Over the years, as part of my work as a garden creator, I’ve had the pleasure of planting several rose gardens, mostly on quite a modest scale.  However, that changed four years ago when I was asked to design a garden from what was a steeply sloping area close to the house.  I had just retired and so the client, whom I’d known for many years, agreed that I would only create the design and oversee the purchase of plants but everything else others would do.  In effect, it meant that I had all the fun tasks without having to commit to working endless hours as their own team of builders and gardeners would do all the hard labour.  Just as well, as the end design involved considerable earth moving and wall building…

The rose garden will be in the middle section
The rose garden laid out but still some way to go before planting…

The change of levels meant that a sizeable terrace was needed and at 25m x 8m (82ft x 26ft) I proposed that this would be the perfect place for a formal rose garden.  Roses are beautiful when in flower but look dreary during the winter, especially when seen en masse.  Here they would be hidden from view but during the warm, summer months their heavy scent would rise to entice the garden visitor to literally follow their nose.  Reaching the steps that lead down to the parterre they are hit by a dazzling display of colour creating a (good) visual shock.  With the shelter and warmth provided by the terrace walls and some yew hedging, the roses have thrived.  The photo below was taken this week, just over three years since they were planted.

The rose garden three years after planting

Walking through the parterre I was pleased that I had decided to plant just four varieties, all with rich, vibrant blooms.  However, it also made me ponder on the countless roses that I have grown over the years and which were, to me at least, the best.  Could I restrict myself to just choosing ten?  Well, here goes and not in any special order. 

More images from the rose garden

Queen of Sweden   Surely this must be everybody’s idea of what the perfect rosebud should look like?  It’s a tall, upright rose not unlike the Queen Elizabeth rose although I think it has the edge on that one.  I have only ever grown it in one garden and perhaps unsurprisingly, the owners were Swedish.  I like to think that hasn’t influenced my choice!  It’s good as a cut flower and excellent as a buttonhole.

The Queen of Sweden rose

Rosa de Rescht   I first came across this heavily scented moss rose in the garden of an elderly artist where she grew it as a low hedge lining a pathway.  Over the years, I got to know her well and she told me it had been planted by her mother when she was a child, so it is obviously a long-lived and trouble-free variety.  It is upright, suckers freely but in a good way which means that it never looks straggly or sparce.  Best of all, the suckers flower true to type so can be used elsewhere.  I was given some several years before the artist died and they have flourished in my own garden.  They are disease free and I have discovered that they thrive equally well in semi-shade under trees.  You can read more about this rose here.

Rosa de Rescht, a moss rose

Rosa Ghislaine de Feligonde   This is quite a ‘new’ rose to me.  A climber, I planted it to scramble along the top of a garden wall in a client’s garden where instead it sulked for about three years at its foot.  I was about to remove it as a failure when it suddenly put on a spurt of growth to become the beauty that it is now.  Is it slow to establish or was it just slow in that particular spot?  I don’t know the answer but how glad I am that I didn’t condemn it to the bonfire.

Rosa Ghislaine de Feligonde

Rosa Weichenblau   The so-called ‘blue’ roses are not everybody’s cup-of-tea and I have mixed feelings about them.  Some I love, others, I’m not so keen.  That’s mostly down to colour as the blueness can vary in intensity.  I like this rambling rose enough to have it in my own garden where it flowers happily along an old wooden fence filling the garden with perfume for a relatively short period of time.  This one I tend to let travel where it wants as periodically quite large lengths of it suddenly die.  I’ve never worked out quite why and it doesn’t really matter too much – I just prune it out and fill the space with the new growth which it regularly sends out.

A love it or hate it rose: Weichenblau

The Crocus Rose   A pale, creamy beauty from David Austen.  I grew this shrub rose in a border combined with apricot-coloured roses; the spaces in-between filled with tall spikes of blue campanula and purple salvias.  All were contained behind a clipped box hedge and it created a lot of interest.  One of the advantages of being a working gardener (I always feel the term ‘professional gardener’ sounds rather dismissive to all those very talented and knowledgeable home gardeners) is that I get the opportunity to experiment with both plants and planting styles and in many different sorts of soils.  However, in this instance, I’ve never tried to recreate it despite its success.

The Crocus Rose

Rosa x odorata ‘Mutabilis’   I find this a fascinating shrub rose as it has all the colours of the sunset in one flower: the buds start a very deep pink, the flowers open to a rich pink and gradually fade to apricot.  The result is this multi-coloured rose which, with its single flowers being produced prolifically and over a very long period, the effect is mesmerising.  It is an open shrub rose with rather wiry, lax branches and so it can get a bit straggly over time.  I’ve found that it responds to quite hard pruning although it isn’t as fast to recover as the modern hybrid roses.  In my present garden it copes with quite windy conditions, and in one place it has sneaked its way in amongst a wall-grown climbing rose where it has reached a height of five feet.  I’ve never tried growing it solely in this way, it would be interesting to find out how it looked.  This plant has had several name changes over the years so you may find it offered for sale as Rosa chinensis ‘Mutabilis’ or just Mutabilis Rose.

Rosa x odorata ‘Mutabilis’

Gertrude Jekyll    Named after the Edwardian garden designer, this vigorous rose is usually sold as a climber where it can reach ten feet.  However, if pruned hard each winter and then pruned into shape, it can be grown as a modest sized shrub.  Either way you’ll be treated to these superb blooms.  I grow it as a climber but I do prune some stems quite hard to make sure that I have growth of all heights.  Left to itself all the flowers will be high above eye level on long stems which make fabulous cut flower arrangements in tall vases.

Gertrude Jekyll, usually grown as a climber

Blush Noisette    Probably best described as a short climber.  My experience is growing it in the corner of a high wall where I only tie in the occasional branch, the rest remaining free yet upright.  It is smothered in these small, almost double flowers and if regularly dead-headed will flower throughout the summer.  Completely trouble-free, it never seems to get attacked by disease or pests.

Blush Noisette

Rosa glauca    Don’t be fooled by the garden catalogues showing a pretty pink almost star-like flower for, as can be seen in the lower left corner of the image below, they are fairly insignificant.  This rose (sometimes sold as Rosa rubrifolia) is grown for the colour of its young leaves and stems, making it much more of a foliage plant.  A shrub rose, if left to its own devices the colour fades: to maintain its colour interest it needs to be quite hard pruned during the winter to encourage new growth.  In the photo below, I planted a trio of them in an herbaceous border with the poppy ‘Patty’s Plum’ in their centre.  This poppy always collapses just as it flowers and, as I hoped, here it has become caught on the rose thorns saving me the task of staking and tying them in.  I treat the roses as if they were herbaceous plants and so they are cut to within a few inches of the ground in early winter along with all the other plants in the border.

The poppy ‘Patty’s Plum’ growing through Rosa glauca

Dog Rose   It may surprise you to find included here our wild rose of the hedgerows, Rosa canina.  I’ve only ever grown it once and that is here in my own garden.  Appearing as an unasked-for bird-sown seedling at the foot of iron estate fencing, any attempt I made at cutting it out only increased its vigour.  I don’t like using weedkillers much and so I accepted defeat and decided to try and tame it instead.  We have reached a truce: I prune out only the longest stems it continually produces and it, in return gives me a splendid, if short-lived display of beautiful pink and white blooms that the bees and other insects love.  Left on, I then have another display of bright red rosehips through early winter after which, it has a severe haircut.  The result has become the talking-point of our garden.   As I have learnt over the years, sometimes the most unexpected plants or combination of plants give the greatest pleasure.

A bird-sown wild Dog Rose growing on a garden fence

The Arts & Crafts Splendour of Rodmarton Manor

In 1906 Claud, the youngest son of politician Sir Michael Biddulph, commissioned a house to be built on land gifted by his father.  The commission was given to Ernest Barnsley who specialised in design and building in the Arts & Crafts style.   In the spirit of the movement, all materials had to be sourced locally and hand-crafted with no machinery used.  Claud stated that the house should have the feel of “a cottage in the country”, somewhat of an understatement by the time the building was completed in 1929.

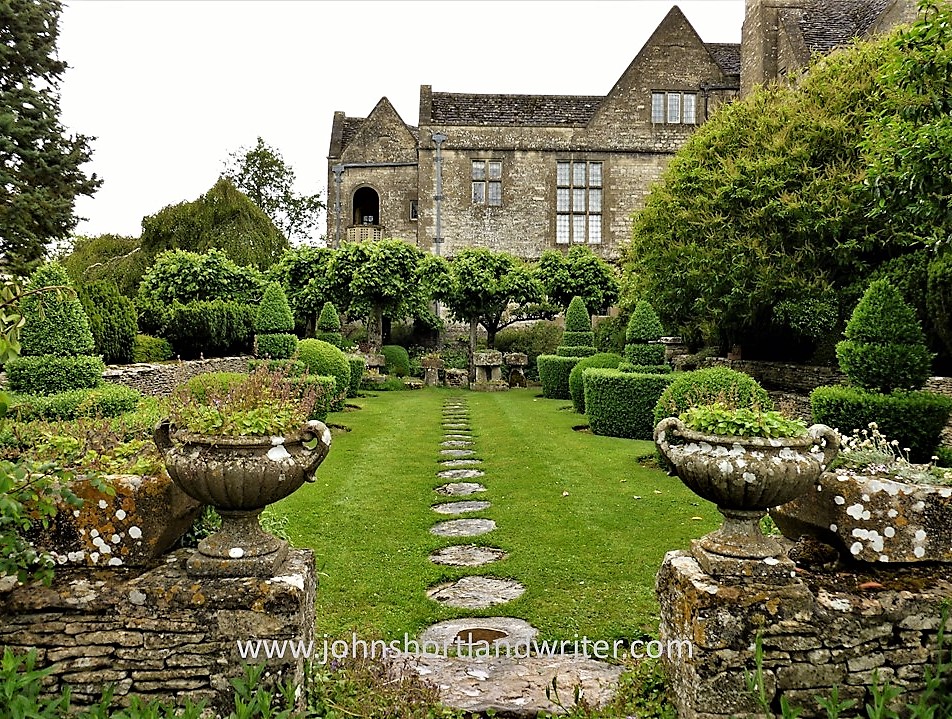
Rodmarton Manor seen from one of the ‘garden rooms’

The house, which has a total of seventy-four rooms, was built as three angled sections with a sweeping driveway and circular lawn to the front courtyard.  The family lived in one wing, servants in another (now converted into flats) and the central section was to be used as a community space where local villagers could meet and learn skills and craftsmanship.  In this way, the Biddulphs were instrumental in maintaining age-old traditions that were in danger of dying out. 

Rodmarton Manor

The mansion, still family owned and open to the public, retains much of its original furniture and furnishings.  Listed as a Grade 1 building by Historic England it has been described as “the single best example of the Arts & Crafts movement”.  On the day of my visit the house was closed but I was able to explore the gardens which are also listed and have been created in the same style.

Old stone urns and troughs frame the entrance

Close to the house, the gardens consist of a series of room-like areas enclosed by stone walls and hedges.  Lichen encrusted pots, urns and troughs, along with precisely clipped topiary give a timeless feel to the garden and also ensures that there is plenty of interest during the winter months. The aptly named Long Garden comes as a surprise after visiting other areas, for although very much of the style, it is relatively narrow in width.  A flagstone path emphasises its 75-metre length and leads to a delightful pavilion, a small pool and a seating area.  Divided by clipped yew hedges and bordered by densely planted herbaceous borders it was, for me, the highlight of the garden. 

The Long Garden at Rodmarton Manor in June
The Pavilion at the far end of the Long Garden

It was disappointing not being able to see the craftsmanship of the interior of the house.  However, the exterior of the building revealed many surprises.  What I liked most of all was the exquisite detail of the rainwater downpipes proving once and for all that even when something is utilitarian it can still also be beautiful.

Even the practical is made to look beautiful exquisite detail of the rainwater downpipes
Every downpipe detail differs

Rodmarton Hall is situated midway between the Cotswold towns of Cirencester and Tetbury and is open to the public throughout the summer months on selected days.  There are additional garden open days in February to view the snowdrops of which there are over 150 varieties.  To find out more click on the link here

A Secret Garden

I have noticed that even those that don’t show the slightest interest in things horticultural love exploring walled gardens, especially if they are overgrown and forgotten.  Perhaps it stirs memories of the children’s novel by Frances Hodgson Burnett published in 1911 in which she shows that when something unloved is cherished and cared for it can become beautiful and healthy, be it a plant or the human spirit.

Houghton_AC85_B9345_911s_-_Secret_Garden,_1911_-_cover

Photo Credit: AC85 B9345 911s, Houghton Library, Harvard University

I have been fortunate over the years in caring for a number of walled gardens in different stages of development yet, regardless of their state, there is something magical in placing the key in the lock and pushing open the door – as nasty, little Mary Lennox discovered in the novel.  As she returned the garden to its former glory so, she too, grew into a loving and loveable child.

Garden Border (4) watermark

Perhaps even more so than the plants and trees within, the beauty of a walled garden comes from the walls themselves.  The brickwork over time has mellowed and seems to release the warmth of a hundred or more summers, even on the greyest of days.  Search the walls and they reveal secrets – a date scratched into a stone, old lead labels revealing the varieties of long-disappeared fruit trees or, occasionally, the name of a much-loved pet buried at its feet.

Walled Garden watermark

The walls in this deserted garden date back to the late 17th/early 18th centuries

Old Plant Tag watermark

Recorded for posterity: the trees may have disappeared but the record of the varieties remain

One of the most rewarding to explore yet emptiest of walled gardens has to be that of Dunmore Park.  The house no longer stands but the garden walls remain crowned by that most eccentric of British garden room follies, the Pineapple.  Here the walls are hollow, fires were lit at its feet and the walls warmed to promote early growth.  Sliding stone blocks could be opened to release the smoke which, filling the garden at night helped to keep frosts at bay.  Clever, those early gardeners.

The Pineapple (11) watermarkThe Pineapple (31) watermarkThe Pineapple (34) watermark

Walled gardens when not open to visitors are more often a place of silence, the only sound to accompany the gardener is that of birdsong and the hum of insects.  It can be a place where your mind can be free from the everyday cares of the outside world.  It can also be a place where your design ideas can run riot either in your head or, if lucky enough, in reality.  The images below show before and after photos of a border I created many years ago, the idea for the colour palette coming from an Imari plate belonging to the owner of the garden.  The border is living proof of an imagination run riot!

Blue & White Border - before watermarkImari Plate   watermark.jpgBlue & White Border - after watermark

Thinking Outside the Box(wood)

Over the years I must have hand clipped many miles of box (in the USA, boxwood) hedging and once the knack is mastered it can be quite therapeutic.  The main rule to follow is to remember that it has to be precise for there is nothing worse than a straight, level hedge that is clipped unevenly.  It irritates the eye as much as a picture hanging crookedly on a wall.

Box Hedge Clipping (2) watermark

Patience and plenty of time are key factors in ensuring straight lines

I can’t say that I feel quite the same about topiary.  I can admire the craftsmanship that goes into producing weird and wonderful shapes but it is so easy, in a lapse of concentration to, say, cut the ear off a teddy bear or the beak off a peacock.  As a consequence, I find it rather stressful.  Cloud topiary is far more forgiving but, again, it doesn’t really “do it for me.”

Box Cloud Topiary watermark

You need even more patience to clip topiary

Perhaps the most rewarding design I have created was turning four rather scruffy and unbalanced squares of box into simple but elegant cubes.  Yes, it was topiary but to misquote Star Trek “it’s topiary Jim, but…”  To begin with, I was faced by the four squares each with a rather ugly and thorny shrub rose growing out of their centres.  A consequence of this design was that the box couldn’t be clipped properly and neither could the rose be properly pruned.

Box Hedge Clipping watermark

The original design with roses always looked scruffy

To create the design the roses had first to be removed leaving a gaping hole in the centre of each square.  Fortunately, I had some reasonably tall box plants elsewhere in the garden that I could dig up and replant.  I soon discovered that it was impossible to plant them properly without damaging the existing plants.  My gamble of just standing them on the earth and then throwing topsoil over them to trickle through the branches paid off.  The soil covered the roots and probably much of the lower branches too*.  Given a good watering, the plants thrived.  Before trimming  all the outer edges needed to be marked with string lines for accuracy in cutting.

Box Hedge - Copy watermark

Without strings for guidance clipping the box into perfect cubes would be almost impossible

I thought about all sorts of fancy designs for the tops of the cubes and, as is so often the case with design, I decided that simplicity was the key to a satisfactory outcome.  Two cubes would have a raised circle and two a raised square.  It was essential that these weren’t too high – I didn’t want them to look like a combination of wedding cakes and pimples!  I found that it was impossible to mark these designs out and so they were created without guidelines, relying on my eye to tell me where and what to clip.  By their second year of clipping they looked as if they had been there for ever.

Box hedge Clipping (10) Year 2 watermark

The design will look just as good in winter when highlighted by frost or snow

Box is such a versatile plant to use and it is well worth experimenting with them.  Below are three photos of how I have used them: the first is the classic edging to a border; the second to bring focus to a set of garden steps; the third a mini-parterre to link two levels in a garden.  Your garden doesn’t need to be huge or grand to use box in these ways – the parterre was suitably small scale for a tiny town garden.  Have a go at creating your own box design – and if creating a topiary peacock is your thing, that’s fine with me – just don’t aske me to clip it!

Apricot & Blue watermark

The classic use for box – fronting a border

Box Topiary watermark

Giving focus to garden steps

Box Parterre watermark

Mini-parterre for a tiny garden


*This is also a good and easy way to create plenty of new plants for the buried stems will often send out roots.  When they do they can be severed from the parent plant to be grown on elsewhere.

Growing Sweet Peas – the lazy person’s guide

Imagine it is mid-summer, the morning sun is warming the day and you are gathering handfuls of pretty, multi-coloured and fragrant flowers to bring back into the house.  If this sounds like a heavenly dream then read on.  The dedicated gardener will need no further encouragement to grow sweet peas but for those less keen on gardening or with little time, they are still the perfect choice.

So, even if your idea of gardening is to sit in it with a glass of chilled, white wine, there is a quick and easy way to grow sweet peas for, at this time of year, pots of young seedlings are available from garden centres.  They are usually grown in a single pot with a dozen or more plantlets crowded together.  They nearly always come as a mix of colours but it is necessary to check that they are a tall-growing and scented variety.  Avoid buying the scentless and/or dwarf types, both of which I dislike intensely – why grow these when they should be fragrant and elegant?

Sweet Peas (3) copyright

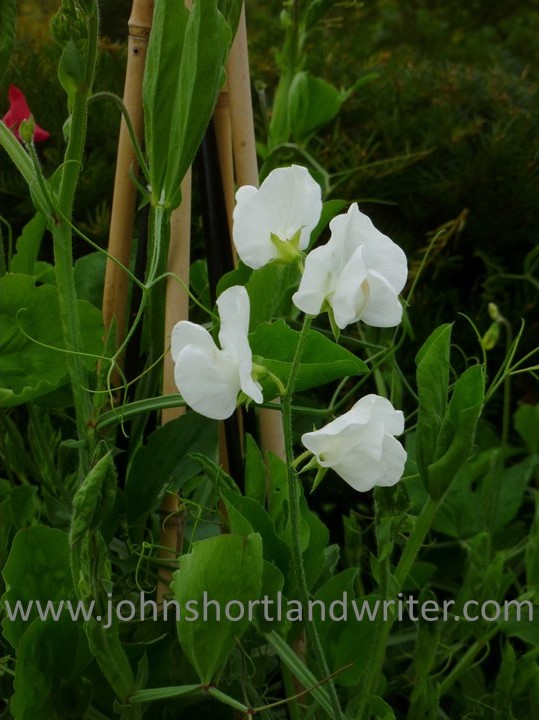
Sweet peas grown informally on a ‘wigwam’ in the garden border

If the weather is reasonable and the soil not frozen, the seedlings can be tipped out of their pot, teased gently apart and popped in the ground about six inches (15cms) apart.  It is beneficial to make sure that the soil in the pot is moist so give them a good drink an hour or so before planting.  Sweet peas, being climbers, need something to clamber up: the traditional way are hazel sticks. These are ideal for the sweet peas attach themselves readily to the rough and twiggy stems.  If hazel cannot be found, bamboo canes also work well although the young plants may need a little helping hand at first to attach themselves – use any short twigs for this just to prop them up.  The canes, which are traditionally placed into a circular ‘wigwam’, need to be about 7-8ft long so that once in the ground they are about 6ft tall.  Apart from keeping them watered in dry spells and free from slugs and snails that’s it.  They will begin to flower in June and continue (providing you pick them regularly and never allow them to set seed) until the autumn frosts.  Incidentally, they grow well up fences too providing they get adequate sunshine.

Sweet Pea copyright

For more experienced gardeners and those that want to enter the local flower show try growing them as ‘cordons’.  With this method they are grown in straight rows on bamboo canes or strings to a height of 5ft.  A place in the vegetable garden is ideal as they can be readily accessed from all angles without treading on other plants.  The spacing is again six inches apart.  For the best blooms, remove the tendrils and any side shoots as they appear, also any flower stems with less than four flower buds. With no tendrils for self-clinging it will be necessary to tie the plants to the stakes with string or by using metal rings sold especially for the purpose.  When the plants reach the top of the canes and/or the flower quality diminishes, cut the plants free of their stakes and lay them carefully along the ground. Tie in the growing tips to their nearest stake and train as before.  The plants will flourish having been given a new lease of life.

Sweet Peas copyright

These sweet peas, grown as cordons, are now ready for layering

Sweet Peas (2)

The layering process

Sweet peas are readily grown from seed, either sown in pots or the ground in March/April or in pots in October.  I prefer to start them in individual pots regardless of the time of year and to protect them from the worst of any cold weather.  The seed does have a hard coating and many gardening books advise chipping the individual seeds with a knife.  Not only is this hard work and time consuming, I have never found it to be necessary.  The seed is both plentiful and inexpensive and if a few don’t germinate does it really matter that much?

The growing and exhibiting of sweet peas reached a peak in late Victorian and Edwardian times with many specialist clubs holding shows.  With patience and luck, who knows you may become a medal winner at your local flower show?  Even if you don’t, you’ll be rewarded by a garden full of colour and a house full of scent.

Book Cover

There is lots more no-nonsense advice for gardeners in my book “Why Can’t My Garden Look Like That?”  To take a peek inside the covers, click here.