In Need of Winter Cheer – and how to get it

With the long, dark nights now upon us (and the gloomy daily news) we could all do with a little cheer to take us forward.  It isn’t too late to take a small step towards obtaining it for there is nothing quite like flowers in the house to lift the mood.  Now is a good time to plant bulbs for indoor flowering.  The choice is surprisingly large and some can have quite exacting growth requirements but the simplest of these – that anyone can succeed with even if they don’t have green fingers – is the sweetly scented, white-flowering Narcissus Paperwhite.

The delicate looking bloom of the Paperwhite Narcissus

Unlike the majority of Narcissus (Daffodils) they do not require a period of complete darkness to encourage them into growth.  In fact, they do not even need to be planted for they will happily flower just anchored in a bowl or pot of gravel that is kept moist.  However, I think they are better planted in potting compost and look far more aesthetically pleasing.  I never bother with special bulb fibre that is sold for the purpose mostly because I tend to have half-open bags of compost kicking around the place that need to be used up.  If you plant the Paperwhites now and bring them straightaway into the house they can be in flower in six to eight weeks.  Those in the photos below were placed in our conservatory and, with the unanticipated warmth from a week of late autumn sunshine which accelerated their growth, have come into flower in just three weeks from planting.  So much for having them in bloom over Christmas!

Note the use of twigs to provide natural looking support

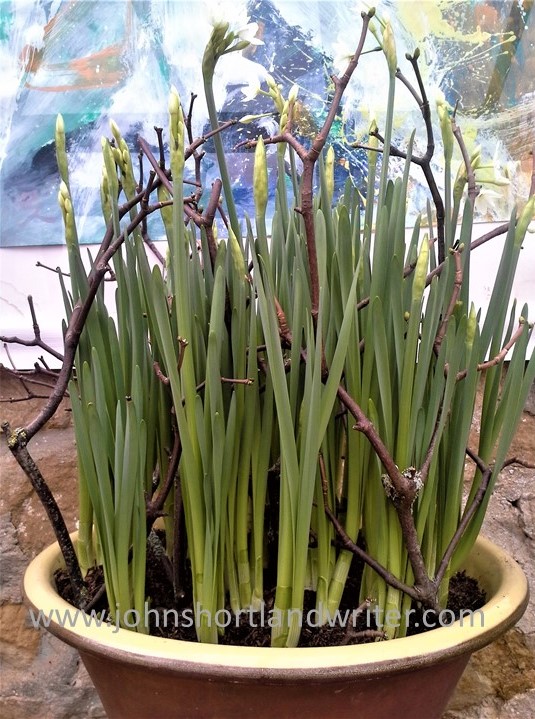
The secret to the planting is to cram as many bulbs as you can into the pot, either in a single or double layer.  If choosing the latter don’t plant directly over one another but stagger them a little so they all have freedom to grow without struggling to push past.  The bulbs in the glazed earthenware pot here were planted in a single layer all touching one another – that way I was able to squeeze in twenty-eight bulbs into a container measuring just twelve inches in diameter. 

Put as many bulbs in the pot as you can squeeze in

Paperwhites have a tendency to flop just when they look their best and the quickest way to prevent this is to push twigs into the compost.  If you do this at the time of planting or very soon after the plants grow strongly through them and look far more natural than when you try to rectify it once they have collapsed.  It is also far less fiddly than using canes and string and looks more natural too.

I have always found hyacinths far more difficult to grow well although I know plenty of people who never seem to have any trouble whatsoever.  They need to be kept in darkness until the flower bud just shows.  I have found them to be rather erratic with their growth and, in the days when I had to provide huge displays for the big country houses I worked for, I grew them in individual, small pots.  By growing more than I really required I could select those of matching height, remove them from their pots and then replant them into the display pots.  They never failed to impress and I never let on how I managed to get such a uniform display!  Far easier are the little grape hyacinths, Muscari, growing here in a glass bowl – an idea I copied after I was given them one year as a gift.

Grape Hyacinths are often sold under the name Muscari

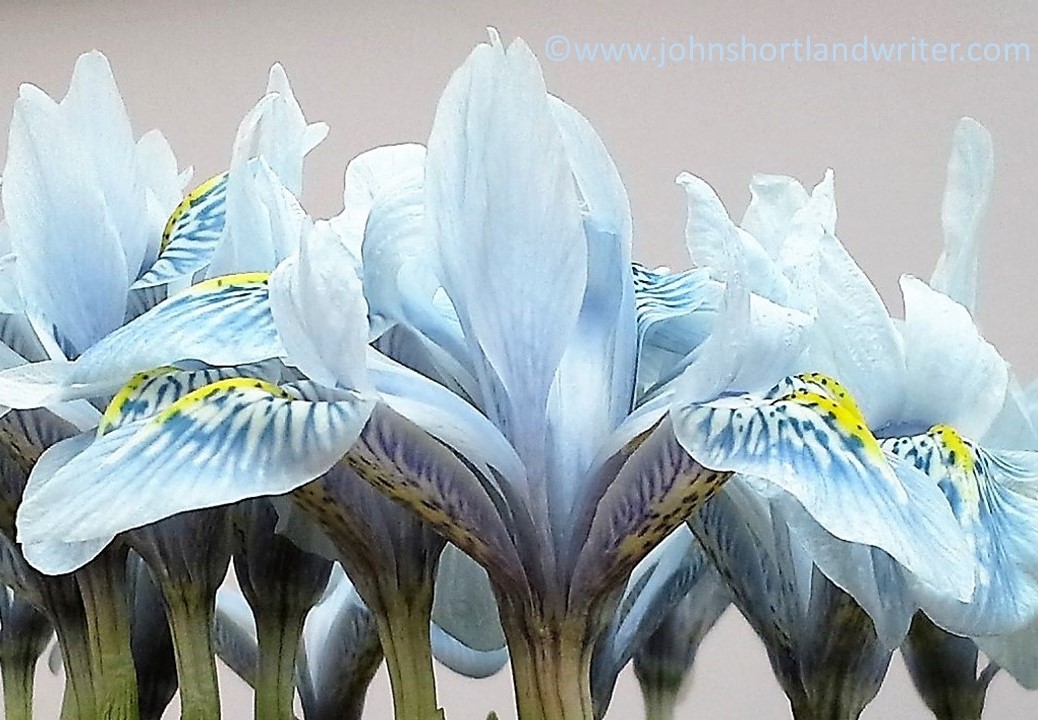
Perhaps one of the loveliest bulbs I have planted in recent years is the miniature iris, Iris ‘Sheila Ann Germaney’ (I have spelt that right!).  Once, again, very easy to grow – just keep them in the dark until they start to grow and then bring them indoors.  After they have finished flowering they can be planted in the garden where they will flower each spring for many more years.

Iris ‘Sheila Ann Germaney’
The Iris’ beautiful markings can be more readily admired when they are indoors

Amaryllis or Hippeastrum are spectacular giants that aren’t to everyone’s taste.  I’m not too keen on them as an individual plant grown on a kitchen window sill although they will bloom there quite happily.  I prefer to use them as cut flowers and for this I tend to grow them in a greenhouse, although a light windowsill would work just as well if you have the space.  They are very straightforward, do not need to be kept in the dark and are often sold complete with pot and compost in gift boxes.  When used as I suggest, several stems placed together in a tall vase look superb.

home-grown Amaryllis used as a cut flower

I have found tulips to be less successful as indoor bulbs although the shorter types should work; I’m just not very keen on those so have never bothered to try.  However, if you have an unheated greenhouse that lies idle through the winter plant the exotic double types there.  Protected from the worst of the cold and rain they flower weeks earlier than normal and can be harvested as exceptionally beautiful cut flowers.

I find tulips for indoors are best grown as flowers for cutting

The secret to indoor bulb growing, as with all forms of gardening, is to experiment and find what works best for you.  Over the years, I have tried all sorts, some surprisingly successful and some, if not quite disasters, they certainly weren’t worth bothering with a second time.  With success, you will have an endless supply of colour and scent for your home and, of course, they make great Christmas and birthday gifts.  This last sentence also gives me the excuse to remind you all that my book Why Can’t My Garden Look Like That?  is still available from Amazon or through booksellers and also makes a great gift!  In it you will find all sorts of hints and shortcuts that I used during my years as a Head Gardener when it was essential that the displays both in the house and the garden were as good as they could be.  Happy bulb planting!

A perfect gift!
Advertisement

On Tulips

The story of the craze for tulips in the 17th century, Tulipomania, is well documented and oft repeated.  Suffice to say, that favoured, single tulip bulbs were selling for thousands of pounds/dollars before the tulip ‘bubble’ crashed.  Today, we are fortunate in having many hundreds of varieties in an unimaginable range of colours and forms to choose from and at remarkably low prices.Hidcote - tulips in the Old Garden copyright

Over the years, my work has taken me to gardens of all sizes and styles, from formal parterres attached to country estate houses to ‘pocket handkerchiefs’, to planting thousands in grassland to planting a score or less in pots.  It has given me the opportunity to experiment with colour as well as variety.  Below are some of my favourites.

Hidcote (11) copyright

The formal parterres of this Victorian Italianate garden (by Charles Barry, designer of the Houses of Parliament) required very restrained planting both in colour and quantity.  Here, I used the variety ‘Spring Green’, which stands well even in harsh weather conditions. After flowering, the bulbs were lifted and dried off to be replanted again later in the year.  It is always desirable to do this as it helps to prevent disease and deterioration of the bulbs.  In practice, it is often easier just to leave them and add a few additional bulbs each autumn to bulk up the numbers, especially when time is short.Kiddington Hall 2001 copyright

Also in a large estate garden but at the opposite end of the style and colour spectrum, three thousand red (‘Bing Crosby’) and white (‘Diana’) tulips were planted on a meadow bank.  Tulips when planted in grassland deteriorate very rapidly – to maintain this display new bulbs were added each year.  However, they do look very beautiful when grown this way – try the almost black tulip ‘Queen of Night’ with blue Camassia bulbs for a magical combination.Tulips bing crosby & diana in grass copyright

Even when planting smaller beds, cramming in as many bulbs as is possible between other plants makes for a beautiful display.  This stunning border was only one metre wide and four in length but there was still room to have plenty of early colour from ‘Purple Prince’ and the lighter ‘Candy Prince’.Tulips Purple Prince & Candy Prince copyright

For formal displays a bed of tulips takes a lot of beating.  They can be single coloured as in this image of pink tulips under-planted with yellow wallflowers (seen at Glasnevin Botanic Gardens in Dublin, Ireland) or mixed colours and planted so densely that no other plants were necessary or desirable (seen at Lismore Castle, Ireland).Tulips - pink copyrightTulips Lismore Castle copyright

For those of us with limited space and budgets, tulips grown in pots are ideal for we can still cram the bulbs in to give a magnificent display.  The images below show how the first layer of bulbs are placed before a second layer is planted above them.  Avoid planting directly over the first bulbs by leaving their tips showing – this will give the bulbs space to develop with much better results.  Top up the plants with potting compost and nature will do the rest; it couldn’t be simpler!  I like to use the more ‘exotic’ looking varieties in pots as the blooms, by being lifted closer to the eye, give more opportunity to admire their spectacular detail.Planting tulips copyrightPlanting tulips in pots copyright

Perhaps the easiest of all tulips to grow are the wild species* and their varieties.  Their delicacy of size belies their toughness.  If they like you, they will increase in number year after year.


Tulipa 'Peppermint Stick' copyright

Tulipa ‘Peppermint Stick’


Tulipa acuminata copyright

Tulipa acuminata

All tulips benefit from being planted as late in the year as possible, November is ideal but even if later they will still flower.  The pot grown ‘Green Eyes’ were planted mid-January this year and have just finished flowering.  They will be planted in the garden in due course to flower again next spring.

Tulip 'Green Eyes' copyright

Tulip ‘Green Eyes’


In England, tulips are flowering at their best right now: take the opportunity to visit open gardens to see which ones you like best.  Make notes of their names so that you can order the bulbs when the catalogues drop through the letter box mid-July.

*always ensure that any bulb is purchased from a reputable source and have not been gathered from the wild.

A Host of Golden Daffodils

If you want to see, as Wordsworth did, a ‘host of golden daffodils…beside the lake, beneath the trees, fluttering and dancing in the breeze,’ in your own garden now is the time to plant them. What’s more, you don’t need a lake or rolling acres to have a spectacular show. The secret is to plant them in quantity and with a little thought on position.

Daffodils (2)    copyright

Daffodils (Narcissus) are incredibly easy to grow for every full sized bulb that you buy already has next spring’s flower formed within it. All you have to do is pop them in the ground as soon as possible after purchase and nature does the rest.Daffodils (2)   copyright

A general rule is to plant any bulb twice the depth of its height: so if your bulb is two inches high, your planting hole needs to be four inches deep. When they are tucked safely below ground at that level the bulbs aren’t so likely to get damaged when weeding. To get the ‘host’ look don’t plant singly or in tiny groups of twos and threes. Think big, think twenty-five, fifty or even a hundred or more. This may sound an expensive option but daffodils are readily available in bulk mail order and many garden centres offer a ‘cram as many as you can into a bag’ deal. It is worth remembering too that the bulbs will continue to increase in quantity and flower for many years making them incredibly good value for money.

Naturalised Daffodils   copyright

Because daffodils flower early in the year, before most other plants in the border have got going, it is not necessary to plant them at the front. If they are planted further back, later their dying leaves will become hidden by spring growth. You will find that when planted too far forward, they are both unsightly and a nuisance.

Narcissus 'Salome'

Narcissus ‘Salome’

One of the best ways of growing daffodils is to grow them in grass or under trees – just as Wordsworth saw them. The simplest way to do this is to simply throw the bulbs and plant them where they fall. Some will land very close together and some further apart which makes them look as if they have been growing there forever. Make the throw gentle, a cross between underarm cricket and bowls – you’re not trying to win the Ashes. In grass, the bulbs will be easier to spot if you mow the grass as short as possible beforehand.

Naturalised Daffodils (3)   copyright

Which varieties to select is only difficult because there is almost too much choice. For naturalising I tend to select three standard varieties that flower at slightly differing times, thereby extending the flowering period. In the borders I just choose those varieties that I fancy.

Narcissus 'Chanterelle'

Narcissus ‘Chanterelle’

Although daffodils are best planted during August and September, I usually find I’m too busy with other garden tasks then. I have found they can be planted right up to December without a problem providing wintry weather hasn’t closed in. If the thought of planting large quantities sounds rather daunting remember you can always plant year after year until you’ve achieved the aimed for look.

Nine thousand daffodils!

Nine thousand daffodils!

John Shortland is the author of Why Can’t My Garden Look Like That? a jargon-free and easy to read gardening manual, available from Amazon and good bookshops.  To take a peep inside click on the image below.

BOOK COVER FROM AMAZON