Creating Warmth in the Garden

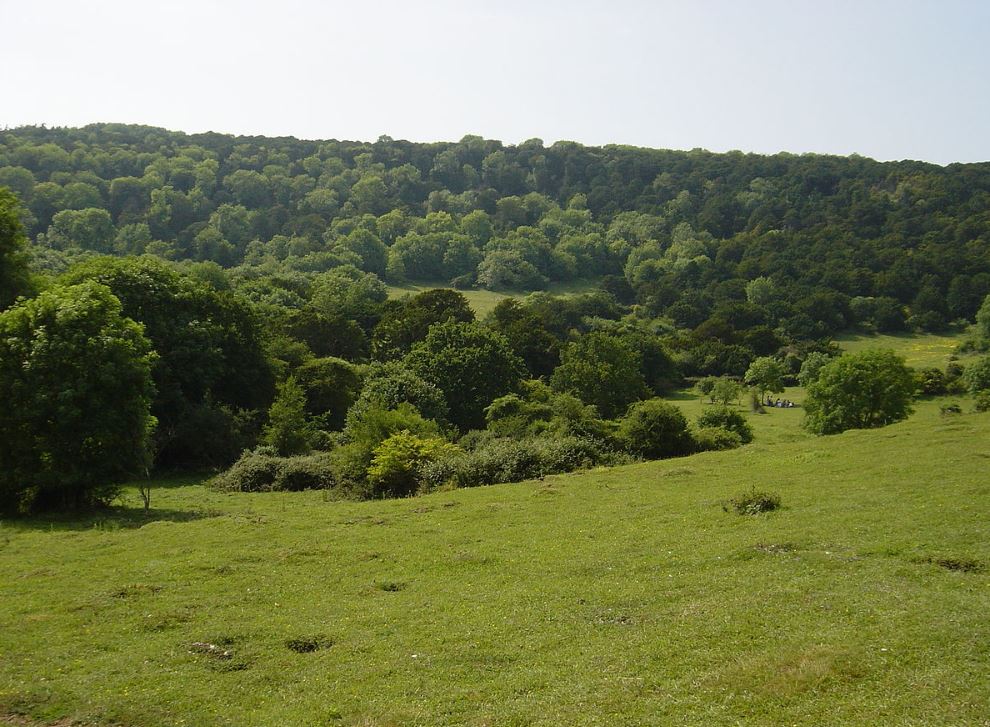
Here, in the UK, we’ve been having the dreariest of winters with what seems weeks and weeks of mild temperatures, heavy overcast skies and incessant rain.  There have been a few cold, bright days but these have been rare.  The view from my window as I write this is of greyness reflected in grey floodwater where our little, winding river has overflown into the field below our house.  Some days it has been so dark and gloomy that the electric lights have had to stay on.  So it seems appropriate to write now about bringing warmth into the garden especially as it is the perfect time to create a new design whether it’s a single bed or a complete redesign.

Floodwater below our house which fortunately sits high enough above it to be ok

Obviously, sun is the most important and easiest way of creating warmth and the garden may already have a patio or other seating area in the sunniest spot.  This isn’t always the most sheltered place however, and there is a world of difference between a welcome, cooling breeze on a hot day and a stronger wind that makes sitting there less comfortable.  There are a number of ways to temper the wind without having to build a solid structure which quite often can create issues with turbulence elsewhere.  The simplest method is by planting, whether a hedge or more open, looser shrubs.  Trellis also works well – we’re aiming at filtering the wind rather than blocking it.  The height does not have to be great to have the desired effect.  The image below shows the early stages of screening using plants – it will also, in time, block out the unwanted view of the road behind.

Screening around a small seating area using yew hedging which will become dense within a year. Note the bamboo to the left of the photo with its warm, golden stems

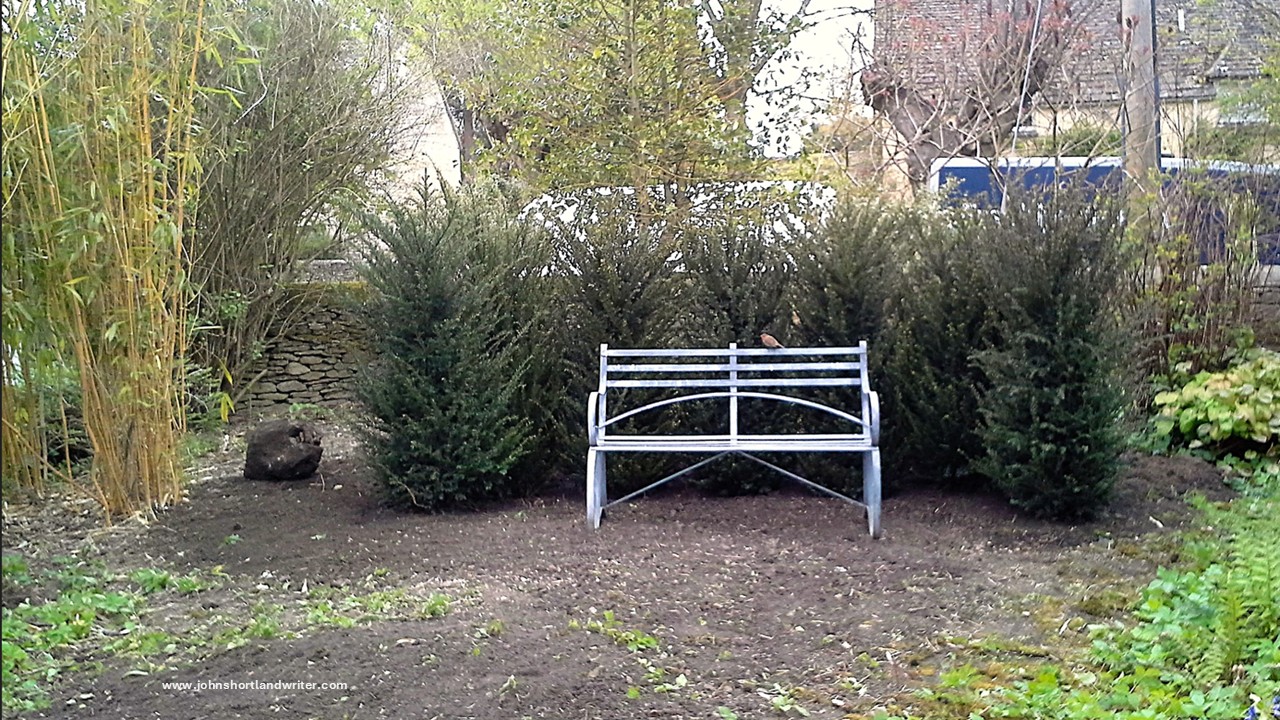
For screening, I often use (as above) yew hedging which gives a good, dark green background and only needs clipping once a year.  It can be bought at various heights and being evergreen, looks good all year round.  Bamboos, now getting rather a bad reputation for being invasive are also excellent if they can be prevented from spreading too widely.  There are some clump forming varieties which are more self-restrained.  In fact, more or less any shrub can be used to make the garden or part of it feel warmer; the secret is to use those with coloured stems or leaves, or flowers that have a hint of the exotic about them.  Bear in mind, ‘though that flowers are often fleeting.

Fuchsia megallanica gracilis ‘Variegata’ : an example of a medium-sized shrub that is hardy, exotic-looking and beautiful
The fiery orange booms of the Trumpet Vine, here climbing through an old wire fence will bring a touch of the Mediterranean to any garden

Although we’ve been talking about ways to make the garden feel physically warmer, it is through the planting of the smaller flowering plants that give the real impression of warmth and here the choice is almost limitless.  The rule is to use strong colours and to keep the softer shades to the minimum.  For the example I’m going to use here, I created this ‘hot’ garden which would be at its best during the summer months when the swimming pool is in regular use.  For cooler evenings or for entertaining there is a vine covered pergola adjacent to a built-in fireplace/barbecue.  Note the use of terracotta painted walls which immediately transports you to the Mediterranean.  In fact. Some don’t believe that the two photos below are really of a garden in one of the coldest parts of southern Britain!

The warm tones of the pool, paving and walls transport you to a warmer climate than the realities of an English summer!
Golden day lilies blend beautifully with the walls of this outdoor fireplace and barbecue area. The grape vine hanging loosely over the beams give shade and the sense of being somewhere other than England

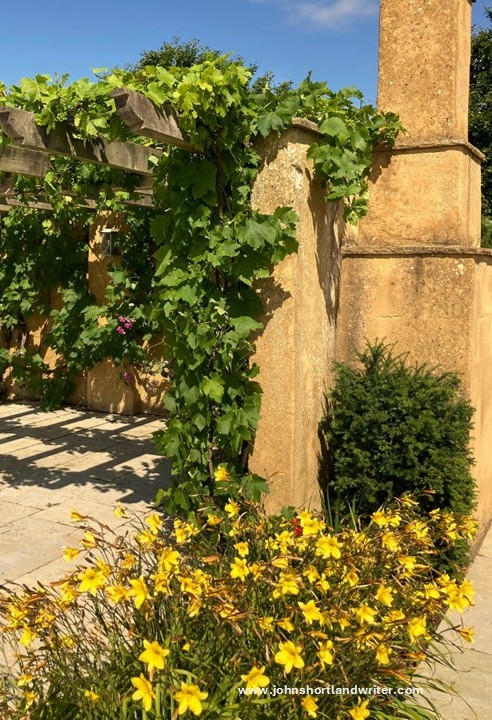
Nearly all of this swimming pool garden is enclosed by yew hedges for shelter and privacy; an existing wall has been coloured terracotta as mentioned above.  Shrubs have been kept to the minimum: there are four Physocarpus Lady in Red’ which has fiery new leaves which darken to burgundy as they mature.  Using the one variety helps to unify the design as well as giving some structure to the borders.  Two figs are trained against the wall and pencil-shaped Italian cypress trees also give that Mediterranean feel (see further note at the end of this blog). 

Transforming a cold garden into a hot one!
In January the garden was almost derelict, by midsummer it had been completed

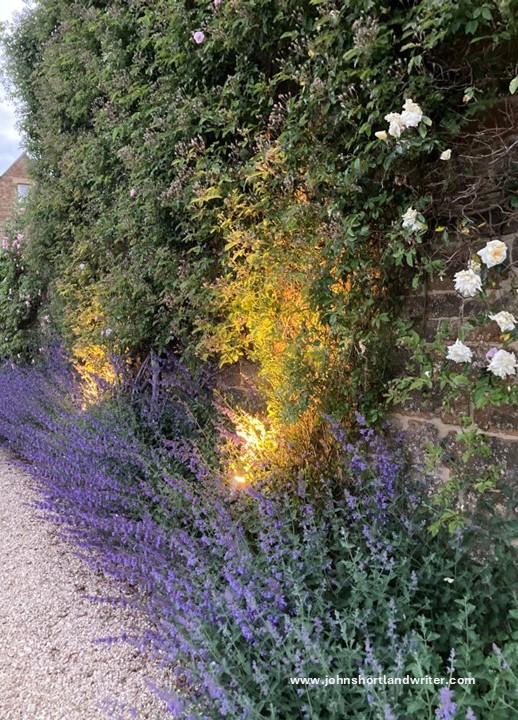
For the planting of the borders, the one against the wall only has catmint (nepeta).  This is a useful plant for it smothers weeds and is equally smothered in blue flowers which compliment its silver-grey leaves.  It is here that two of the Physocarpus are also planted to give a contrast in both height and leaf colour.  As soon as the first of the catmint flowers begin to fade it is important to then cut off every stem to ground level.  This may seem ruthless, especially as there will still be quite a lot of flower on it but within two weeks it will regrow and soon be flowering again.  If left, the first flowering stems die back and the plant looks messy.

The ball-headed flowers and dark leaves of Physocarpus compliment the contrasting Astrantia ‘Claret’
Catmint (Nepeta) flowering elsewhere in the garden

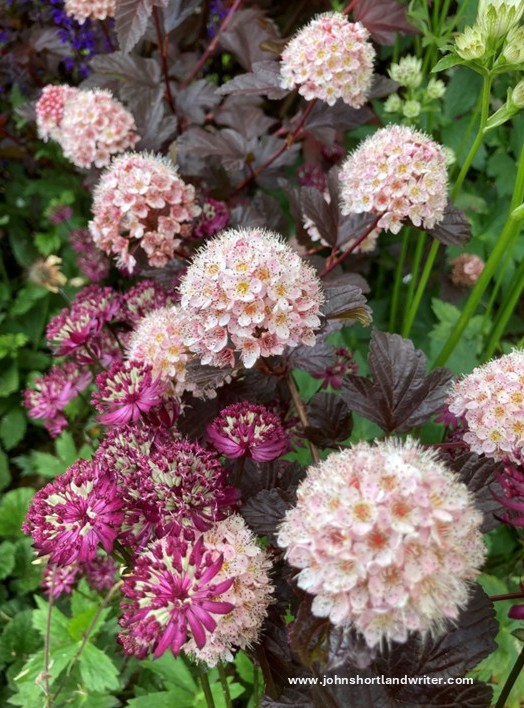
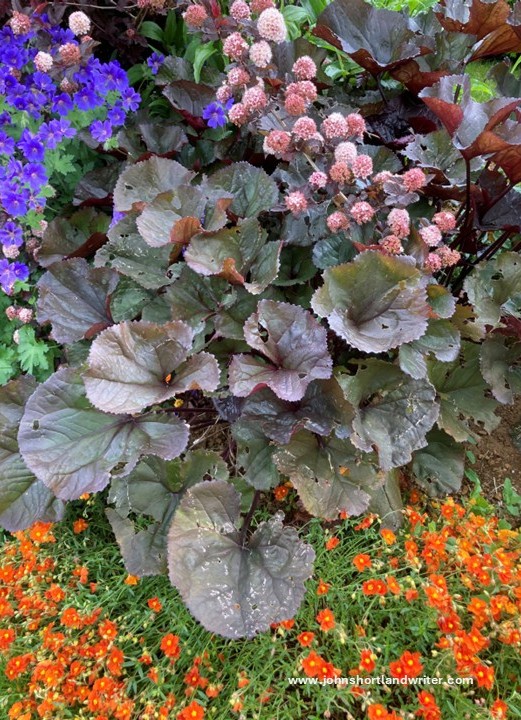
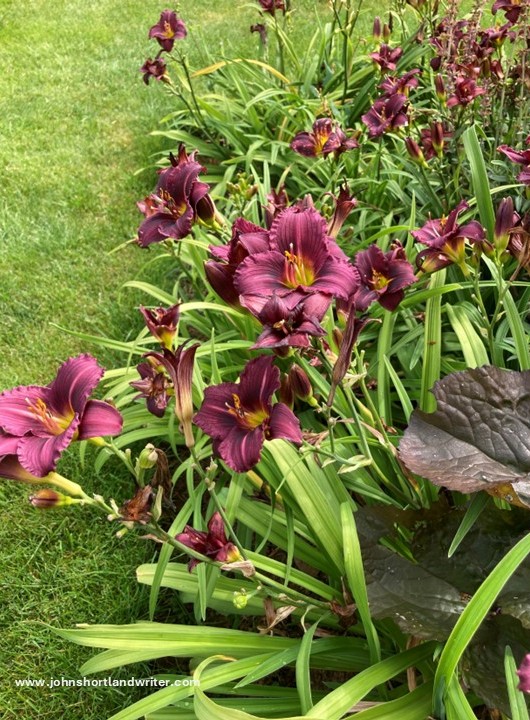
The twin borders are set back from the pool, and again Physocarpus are used as the centrepiece for height.  The burgundy theme is continued with the deep wine-coloured leaves of Ligularia, the papery flowers of Astrantia and trumpet-shaped Day Lilies (Hemerocallis).  The latter are an especially useful plant for they send out their bright green and sword-like leaves early in the spring and they never look untidy.

The dark leaves of Ligularia contrast with the tiny orange flowers of Helianthemum. Later the Ligularia will send up spikes of golden flowers
Day Lilies flower all si=ummer if regularly dead-headed. This one is Hemerocallis ‘Little Grapette’

For contrast, and to maintain the hot theme,  I have mostly used oranges and golden yellows, the plants chosen to give continuity of display from June to the first frosts.  These are interplanted with purple salvias and shocking pink echinacea to break the colour – not too many: just enough to emphasise how much orange/yellow there is, if that makes sense.  This part of the garden isn’t used much for the rest of the year but the displays could begin in early spring with golden daffodils, especially the exotic looking orchid varieties, followed by masses of deep-coloured tulips and wallflowers.  For the winter, the scarlet and orange stems of dogwoods would brighten the dullest of days.  My client didn’t want too many pots or planters but I did manage to squeeze in two planted with the wonderful dwarf Pittosporum ‘Tom Thumb’.  Summer pots filled with zinnias and tall spikes of fiery red or orange cannas would really compliment a garden like this, but it’s not to be.

Although the same tone, the shape of the orange daisy-like flowers of the Ligularia contrast well with the trumpet-shaped Hemerocallis ‘Burning Daylight’ in the background
Pittisporum ‘Tom Thumb’: the new pale green leaves turn to burgundy as they age

I hope that this post may have inspired you to be bold with your choice of colour.  I’ve illustrated it with one garden devoted to this style of planting but it can be greatly scaled down to just a single bed or corner – the twin beds above only measure about 5m x 2m each.  Below is a list of the plants that I have used which is by no means, exhaustive for there are endless possibilities to choose from.

Two year on and the the twin borders glow under the dramatic evening light

Plant List
Astrantia ‘Claret’
Echinacea purpurea
Geranium x magnificum
Geum ‘Princes Juliana’
Helianthemum ‘Hennfield Brilliant’
Hemerocallis ‘Burning Daylight’
Hemerocallis ‘Little Grapette’
Ligularia ‘Desdemona’
Nepeta ‘Walker’s Low’
Physocarpus ‘Lady in Red’
Potentilla fruticosa ‘Tangerine’
Rudbeckia ‘Prairie Glow’
Salvia ‘Mainacht’

A note about the Cypress trees.
The cypress were already established and are now beginning to get too large for the space so may end up being removed. When reduced in size they tend to lose their elegant shape.  I am inclined to replace them with Irish Yew which is naturally columnar in shape and withstands pruning.  The golden-leaf cultivar would blend well with the walls as well as contrast with the dark green yew hedging.

If you’ve enjoyed this post and found it helpful and interesting don’t forget that there’s my book that reveals all sorts of gardening tips. Written in an informal, no-jargon way for the newcomer to gardening but also for those with more experience. If you’re not that enthusiastic about your own garden or have little time to devote to it then this is the book for you! Available from bookstores and/or Amazon.

With a foreword by Josceline Dimbleby

Happy Gardening!

Old Yew, New Yew, Renew Yew

Although in the UK the yew tree (Taxus baccata) is often called English Yew it is, in fact, very widespread in its distribution growing throughout Europe as well as parts of Africa, Iran and Asia. It can live to a great age and there are several, mostly growing in churchyards, that are thought to be a thousand or more years old. One such tree grows in the Chiltern village that I lived in before moving to the Cotswolds; it is enormous having a girth of over 5.5 metres.  Despite being a British native that has grown naturally in the wild for thousands of years, yew woods are very rare – I can only think of two (although there must be others): one in the Chilterns behind Watlington Hill and the other in Sussex.  One of the reasons for this is that yew was the favoured timber for making longbows – by 1294 yew stocks were so depleted that imports were being sourced from mainland Europe.

yew forest

The yew forest at Kingley Vale, Sussex, England – one of the finest examples of this rare habitat in Europe [photo credit: Ben Shade]

Yew watermark

The huge girth of the ancient yew in the churchyard at Ibstone , Chiltern Hills, England

Yew is unusual in that the individual plants can be male, female or a combination of the two.   All-male trees release huge clouds of pollen whereas all-female produce none and can be identified by their glowing red berries.  It has even been known for individual trees to gradually change sex with all-male specimens becoming all-female and vice versa.  Although the pollen clouds can be extremely irritating if caught in one, in the average garden situation where mature trees are less likely to be found the pollen release is much more limited.

Swerford Park - Yew Berries(11) watermark

The glossy red flesh is the only part of yew that is non-poisonous. It’s still not advisable to eat it!

In its natural condition yew is a spreading, evergreen tree, wider than it is tall.  However, for many centuries it has been clipped and shaped into hedges and topiary for which its regular, and when treated in this way, tight growth makes it ideal.  It responds well to being kept low, say around 45cm, or can be stopped at any height required.  Likewise, it can be clipped into neat cubes, intricate spirals as well as the ubiquitous peacock beloved by stately homes.

Hidcote (6) watermark

Yew topiary at Hidcote, Cotswold Hills, England

Yew Topiary watermark

Intricate yew topiary at Farmleigh Gardens, Dublin, Ireland

One of the characteristics of yew is its ability to send out new growth from old branches and even from its trunk.  This can be readily seen when the branches are parted or the main stems are exposed.  To maintain a clean trunk these growths should be pruned away before they become established.  With hedges and trees it means they can be reduced in size as drastically as you might wish although it is important to bear in mind that a heavily pruned tree may never be restored to a thing of beauty.

Yew (2) watermark

Yews ability to regenerate from old wood means that it can be pruned as hard as you dare

If reshaping trees is a skill difficult to master, restoring overgrown or gappy yew hedging only takes courage although for best results it may take a few years to achieve perfection.  Begin this process by removing all growth back to the trunk on one side only.  The hedge will now look ugly but new growth will soon sprout and the following year or in year three the other side of the hedge can be given the same treatment.  Apart from the benefit this staggered pruning has to the health of the yew another advantage is that the screening from the unpruned side means there is no loss of privacy.  The height of the hedge can also be reduced at the same time as side two cutting 6-12 inches below its required finished height to allow for regrowth.  By year five, if not sooner, the hedge will be a manageable, healthy screen once more and will continue to be so for very many years.

Yew Hedge Regeneration watermark

The first stage in regenerating an old yew hedge

As with all plants, especially those that are long-lived, careful planting is essential to give them a good start.  Yew copes with most soil types including chalk but hates waterlogged or compacted soils.  Whatever the soil, enrich with good quality compost or well-rotted manure; if any parts are excessively damp create a low bank at least six inches high to ensure the roots establish in the marginally better drained soil.  Pot-grown yews can be planted at any time of the year providing the ground isn’t frozen; the best time is mid-autumn and spring when the soil is warmer. The optimum size for quick establishment is 2-3 feet and this size also makes planting a hedge quite economic too.  With a bigger budget larger plants may be purchased.  These in the photo below are over six feet high and create an instant hedge when planted closely together.  Because of their size they are usually ‘root-balled’ and only available during the cooler months.  The hessian and wire mesh root ball should be left intact as they quickly decay once planted although the wire collar may be released if it fits too snugly against the stem.  In windy situations they may require staking; they will certainly need careful watering for the first two years of their life.

Secret Garden (4) watermark

Rootballed yew waiting to be planted – they will make a fine, if somewhat costly, instant hedge

However you chose to use your English Yew, whether as hedging or as topiary, there is one common rule to clipping and that is accuracy for nothing looks worse than a formal hedge or piece of topiary that does not have clean, sharp lines.  The ideal time for clipping is August although spring is the time for restoration pruning.  One word of caution – all parts of yew are highly toxic if ingested.  It is essential that clippings are disposed of carefully for it can be fatal if livestock such as horses have access to them.  Yew clippings from regularly clipped hedges can be sold for use by pharmaceutical companies to make cancer treatment drugs.  In the past, when I was the Head Gardener of a large country estate with extensive yew hedging, we secured a not-inconsiderable amount of money over time which the estate donated to cancer research charities.  I believe that, for 2020, collection has been suspended but hopefully it will be resumed in future years.

Kiftsgate Court (4) watermark

A beautifully clipped yew hedge creates the perfect backdrop to any garden – Kiftsgate Court, Cotswold Hills, England


Thinking Outside the Box(wood)

Over the years I must have hand clipped many miles of box (in the USA, boxwood) hedging and once the knack is mastered it can be quite therapeutic.  The main rule to follow is to remember that it has to be precise for there is nothing worse than a straight, level hedge that is clipped unevenly.  It irritates the eye as much as a picture hanging crookedly on a wall.

Box Hedge Clipping (2) watermark

Patience and plenty of time are key factors in ensuring straight lines

I can’t say that I feel quite the same about topiary.  I can admire the craftsmanship that goes into producing weird and wonderful shapes but it is so easy, in a lapse of concentration to, say, cut the ear off a teddy bear or the beak off a peacock.  As a consequence, I find it rather stressful.  Cloud topiary is far more forgiving but, again, it doesn’t really “do it for me.”

Box Cloud Topiary watermark

You need even more patience to clip topiary

Perhaps the most rewarding design I have created was turning four rather scruffy and unbalanced squares of box into simple but elegant cubes.  Yes, it was topiary but to misquote Star Trek “it’s topiary Jim, but…”  To begin with, I was faced by the four squares each with a rather ugly and thorny shrub rose growing out of their centres.  A consequence of this design was that the box couldn’t be clipped properly and neither could the rose be properly pruned.

Box Hedge Clipping watermark

The original design with roses always looked scruffy

To create the design the roses had first to be removed leaving a gaping hole in the centre of each square.  Fortunately, I had some reasonably tall box plants elsewhere in the garden that I could dig up and replant.  I soon discovered that it was impossible to plant them properly without damaging the existing plants.  My gamble of just standing them on the earth and then throwing topsoil over them to trickle through the branches paid off.  The soil covered the roots and probably much of the lower branches too*.  Given a good watering, the plants thrived.  Before trimming  all the outer edges needed to be marked with string lines for accuracy in cutting.

Box Hedge - Copy watermark

Without strings for guidance clipping the box into perfect cubes would be almost impossible

I thought about all sorts of fancy designs for the tops of the cubes and, as is so often the case with design, I decided that simplicity was the key to a satisfactory outcome.  Two cubes would have a raised circle and two a raised square.  It was essential that these weren’t too high – I didn’t want them to look like a combination of wedding cakes and pimples!  I found that it was impossible to mark these designs out and so they were created without guidelines, relying on my eye to tell me where and what to clip.  By their second year of clipping they looked as if they had been there for ever.

Box hedge Clipping (10) Year 2 watermark

The design will look just as good in winter when highlighted by frost or snow

Box is such a versatile plant to use and it is well worth experimenting with them.  Below are three photos of how I have used them: the first is the classic edging to a border; the second to bring focus to a set of garden steps; the third a mini-parterre to link two levels in a garden.  Your garden doesn’t need to be huge or grand to use box in these ways – the parterre was suitably small scale for a tiny town garden.  Have a go at creating your own box design – and if creating a topiary peacock is your thing, that’s fine with me – just don’t aske me to clip it!

Apricot & Blue watermark

The classic use for box – fronting a border

Box Topiary watermark

Giving focus to garden steps

Box Parterre watermark

Mini-parterre for a tiny garden


*This is also a good and easy way to create plenty of new plants for the buried stems will often send out roots.  When they do they can be severed from the parent plant to be grown on elsewhere.